DIY Lazy Susan Serving Plate
Several months ago I made a rotating lazy susan turning tray based on a beautiful handpainted DIY Lazy Susan Serving Plate my sister-in-law, Stacy put together. She used an ornately decorated plate she found at World Market and glued it to a Rotating Turntable Lazy Susan. I have been on a quest to make something similar to that ever since.
Earlier this week I found myself at an annual holiday craft fair I like to help my mom with. My mother is a master with fiber arts and makes beautiful things. Part of the fun of helping with this fair is walking around and seeing all the handi-crafts and tasty treats at each table. I found a nice older woman who had all sorts of hand-painted wooden things – trays, plates, little tables and small dressers. I loved her designs, in particular a red stained large wooden plate with hand-painted flowers and leaves. I instantly thought of my mother-in-law when I saw this plate and her amazing Thanksgiving decorations. I decided to buy that plate from the nice old lady and make a lazy susan serving plate to gift to my mom-in-law for her Thanksgiving table.
Here is a pictures of the plate I found at the craft fair:
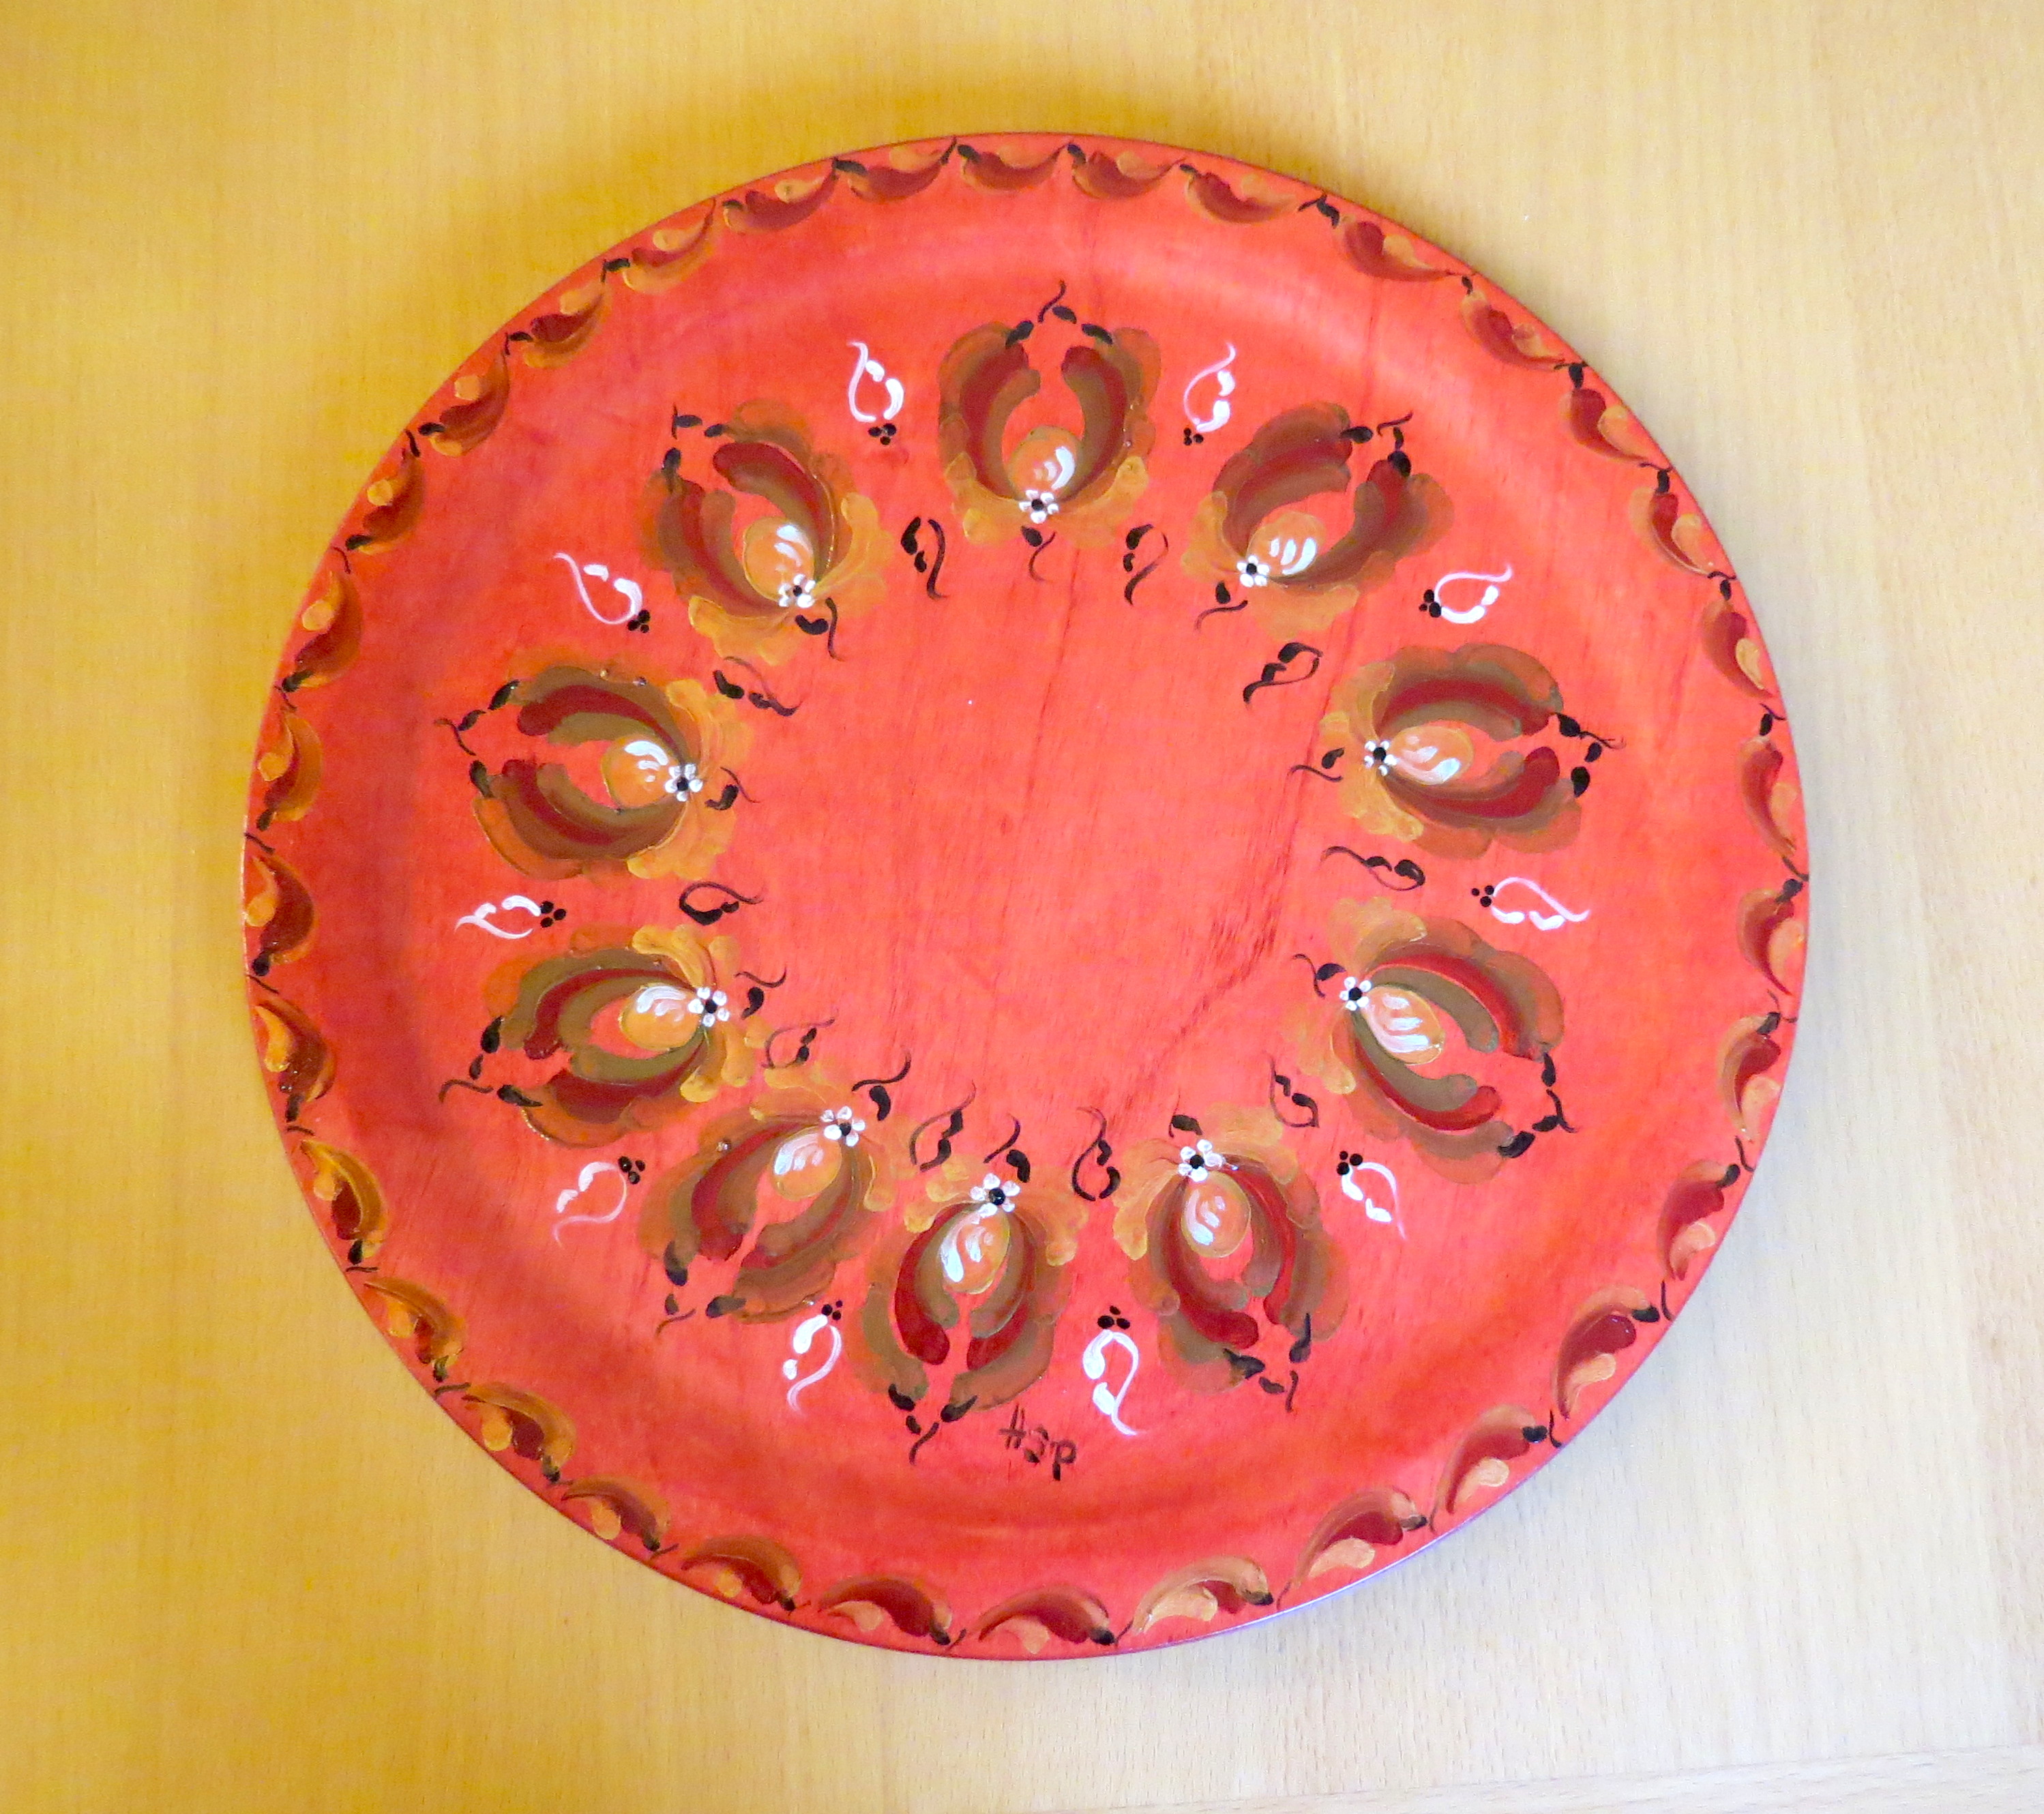
Hand-painted and stained serving sized plate
On my way home from the fair I stopped by at our local Ace Hardware store. I called first to find out whether they had a lazy susan mechanism I could use to glue under this pretty plate to make it turn. They told me they had a few sizes so I decided to go by and see the options. I ended up going with the smaller sized lazy susan device (meant to be screwed into corner cabinets). It had 4 flat sides on the corners so I figured there would be enough space to glue it down to the plate. I spent around 5 dollars on the small turn table mechanism.
Here is what the turning device (lazy susan) looked like when I glued it to the back of the plate:
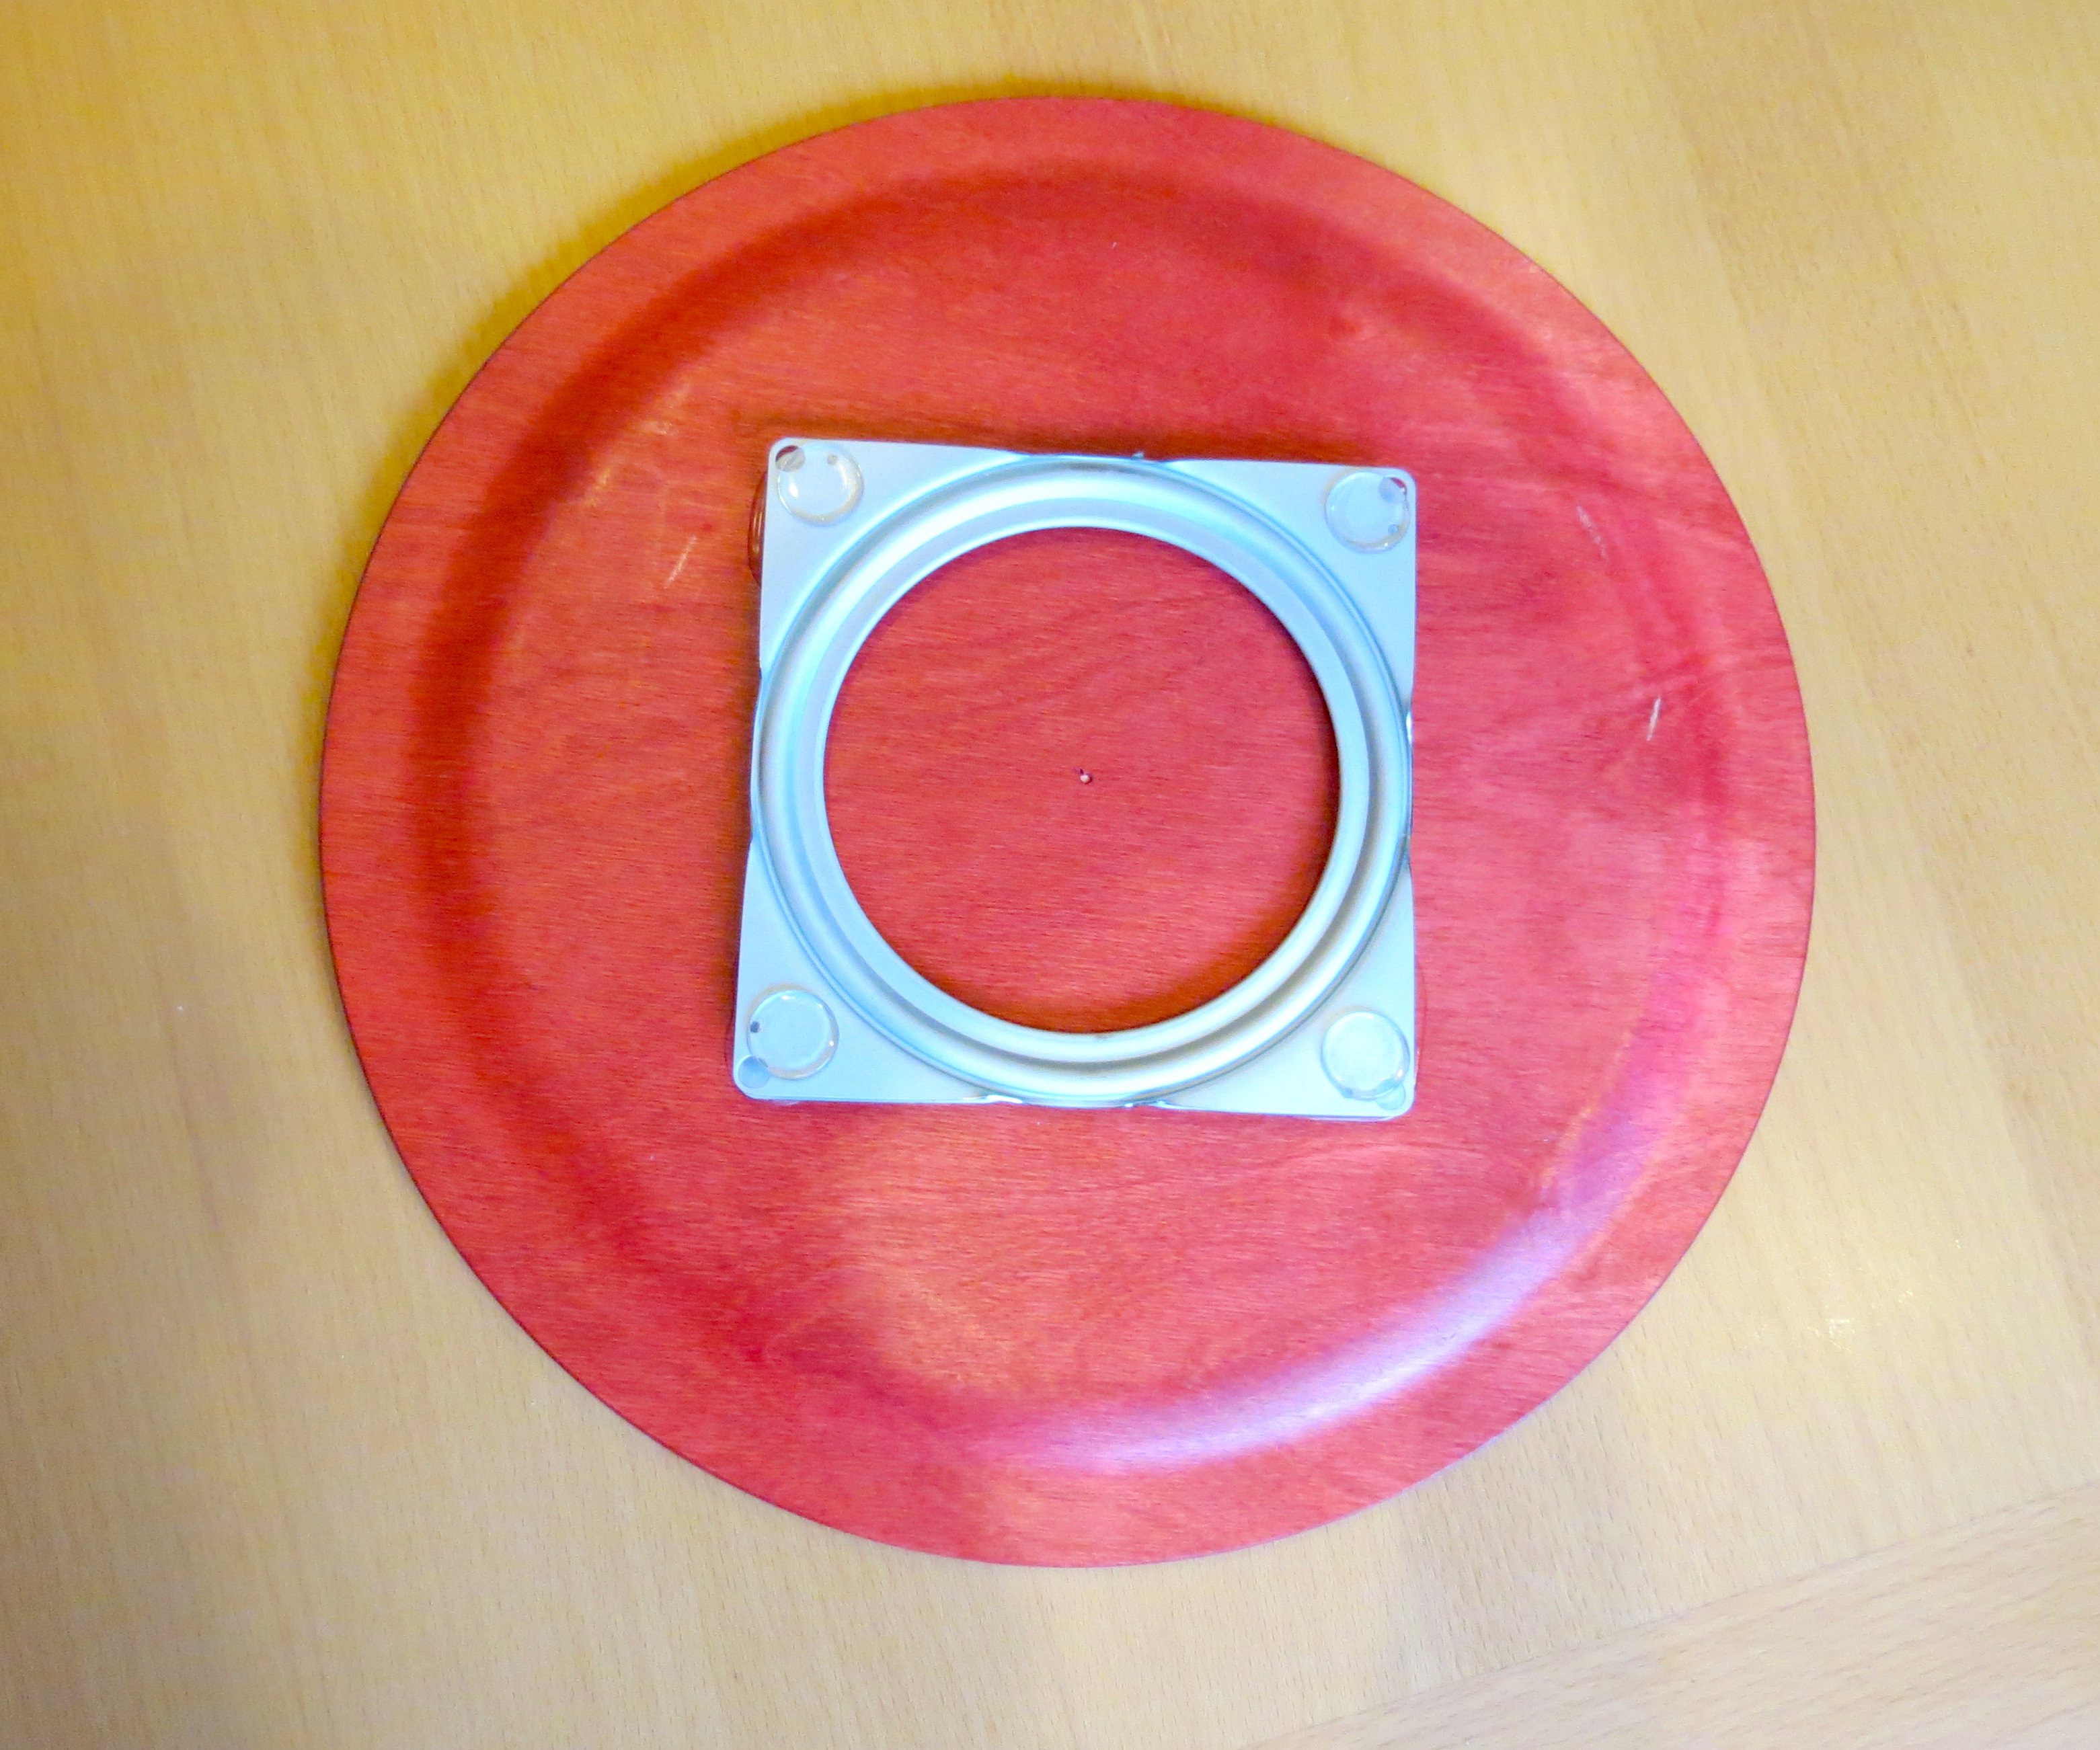
Lazy susan device glued to the back of hand painted plate.
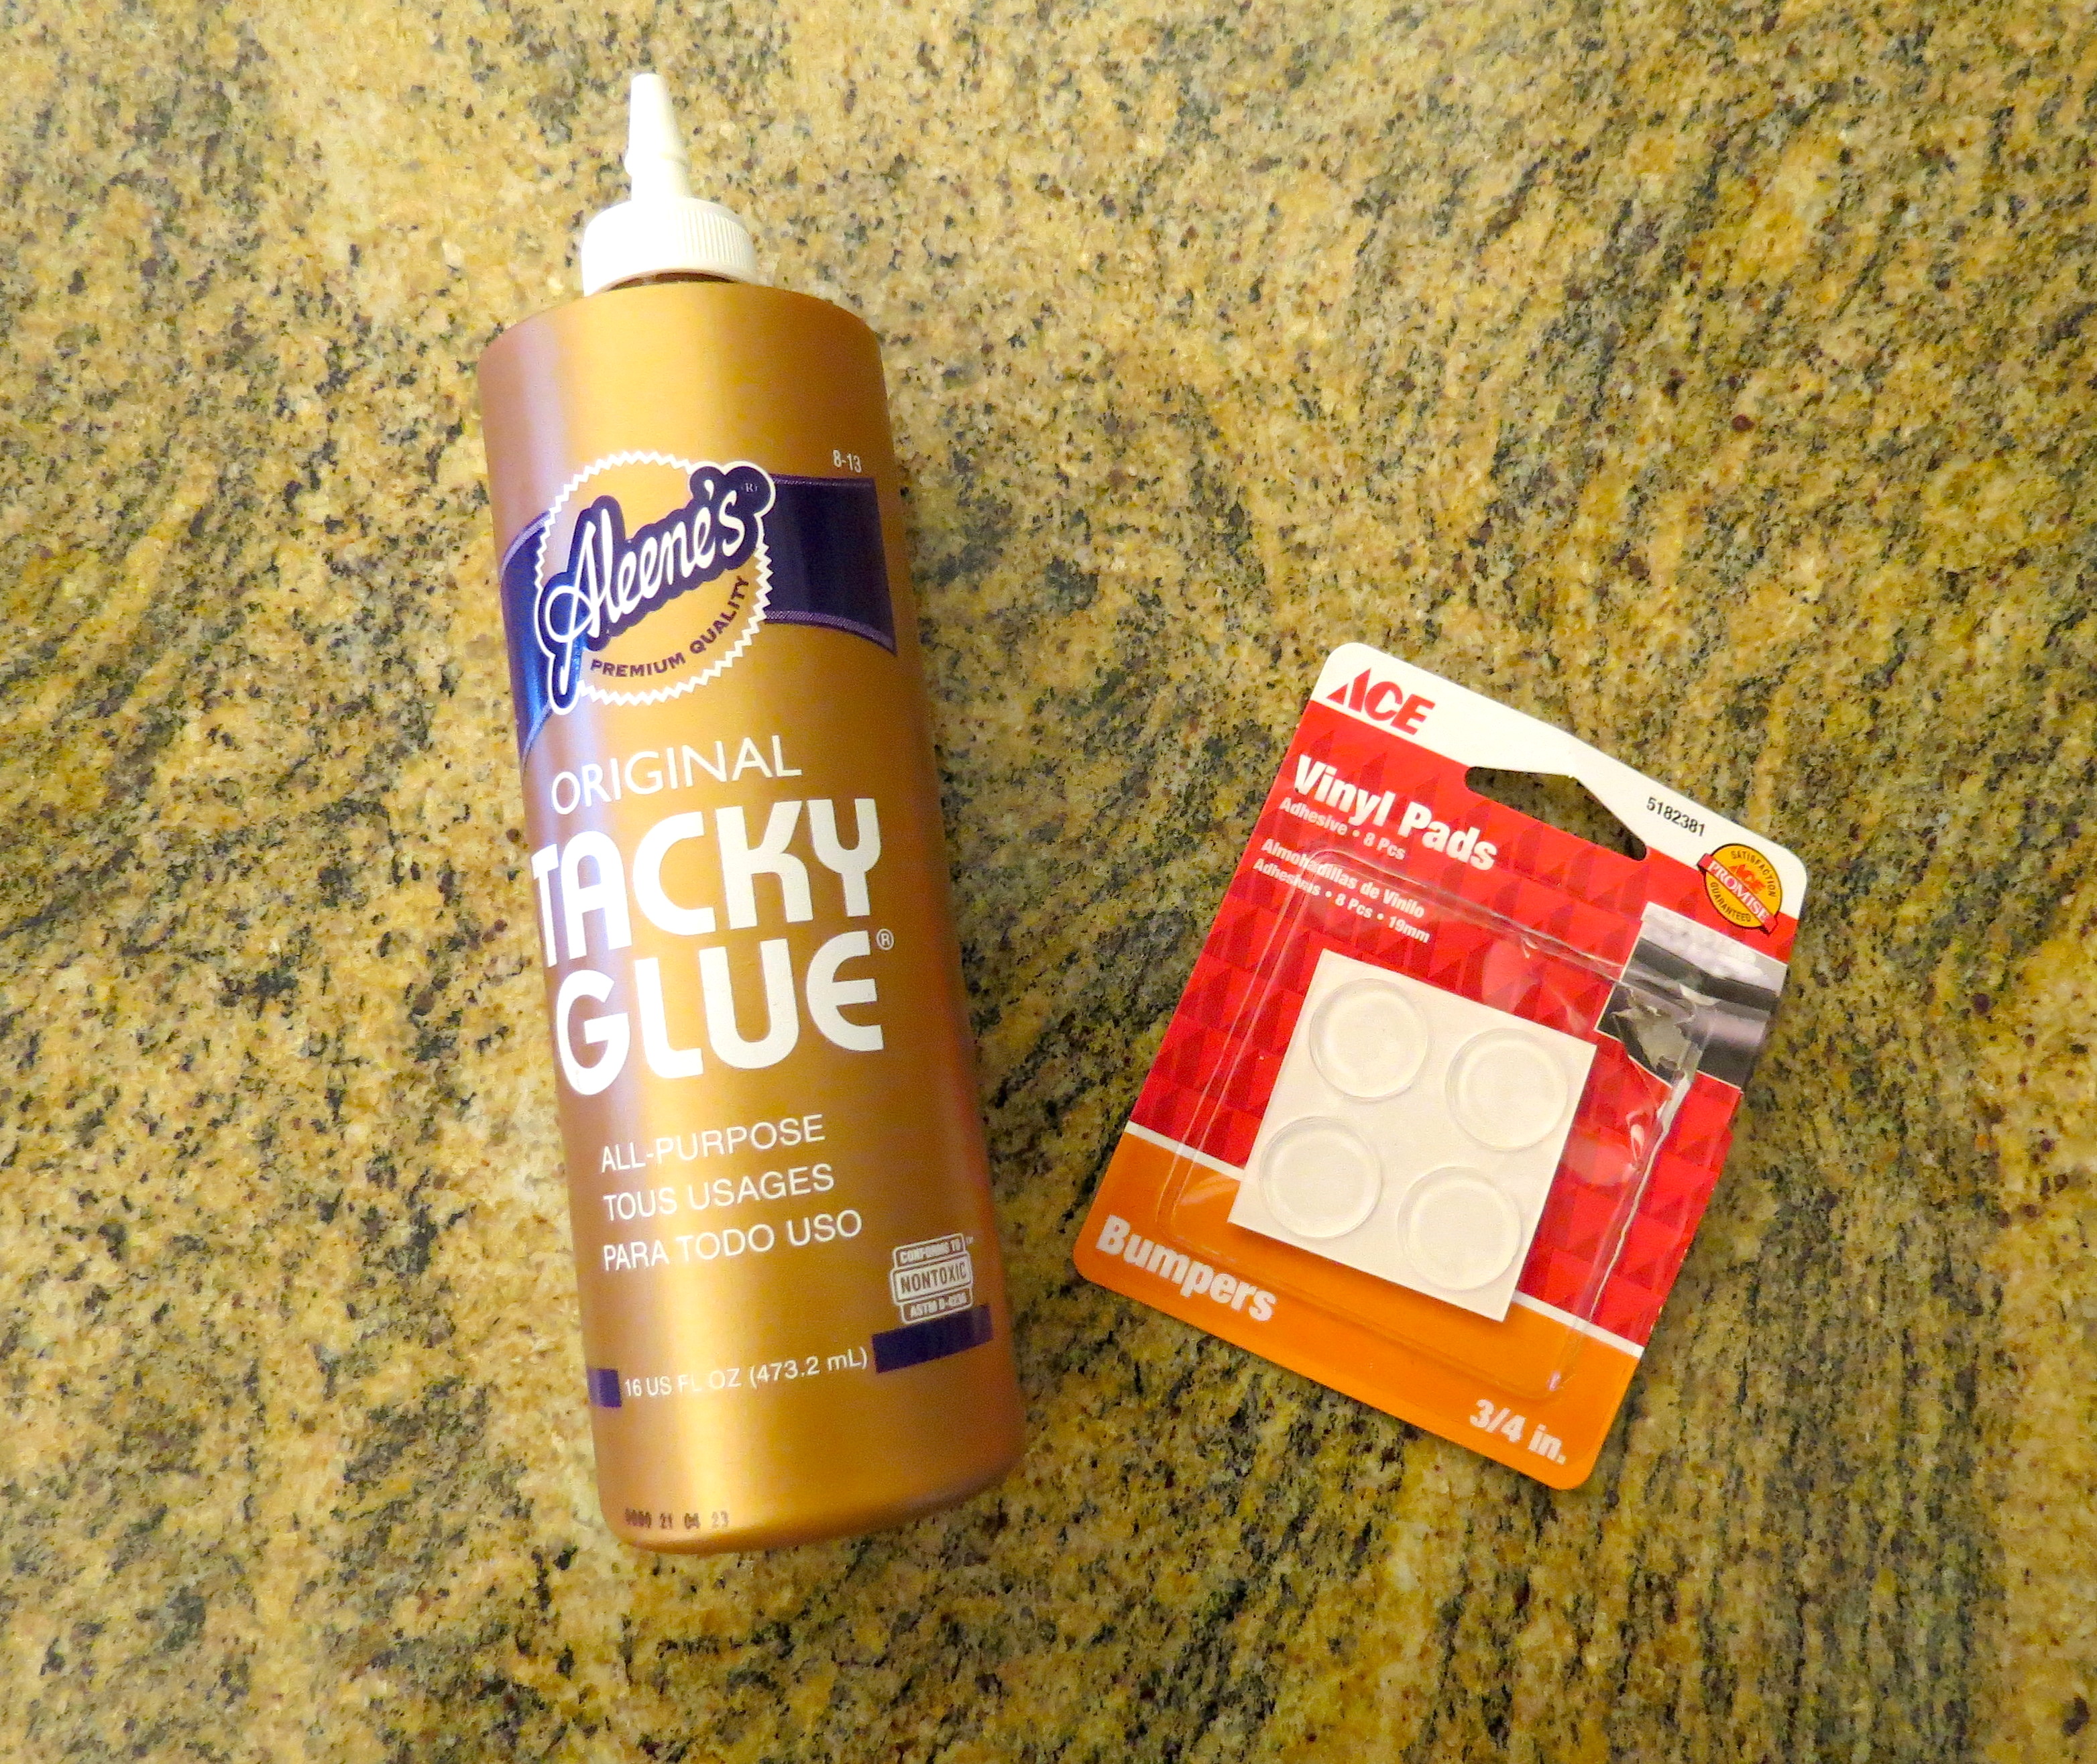
I thought about using my handy glue gun to get the lazy susan attached to the plate but went with Tacky glue to get a flatter drying glue effect. Glue gun glue sometimes clumps up on me unevenly. The Tacky glue worked well. If you go with Tacky glue remember it takes time to dry. I let mine dry over night plus a few more hours in the morning.
I also picked up small Adhesive Vinyl Pads from Ace hardware to stick on each of the 4 corners of the lazy susan mechanism. If you look closely at the photo above you will see the small round, rubbery pads. I put these on to keep the plate in place when it is being turned.
So basically, aside from the serving plate, I only needed three things to put this lazy susan serving plate together; the lazy susan mechanism, the Tacky glue and the adhesive vinyl pads.
Here is a photo of the glue and the pads:
That’s it. I will put in a video of the pretty plate rotating. It turned out so nice and I can’t wait to give it to my mom in law and see it on the table for Thanksgiving!
