Beachy Braided Shirt Re-Do
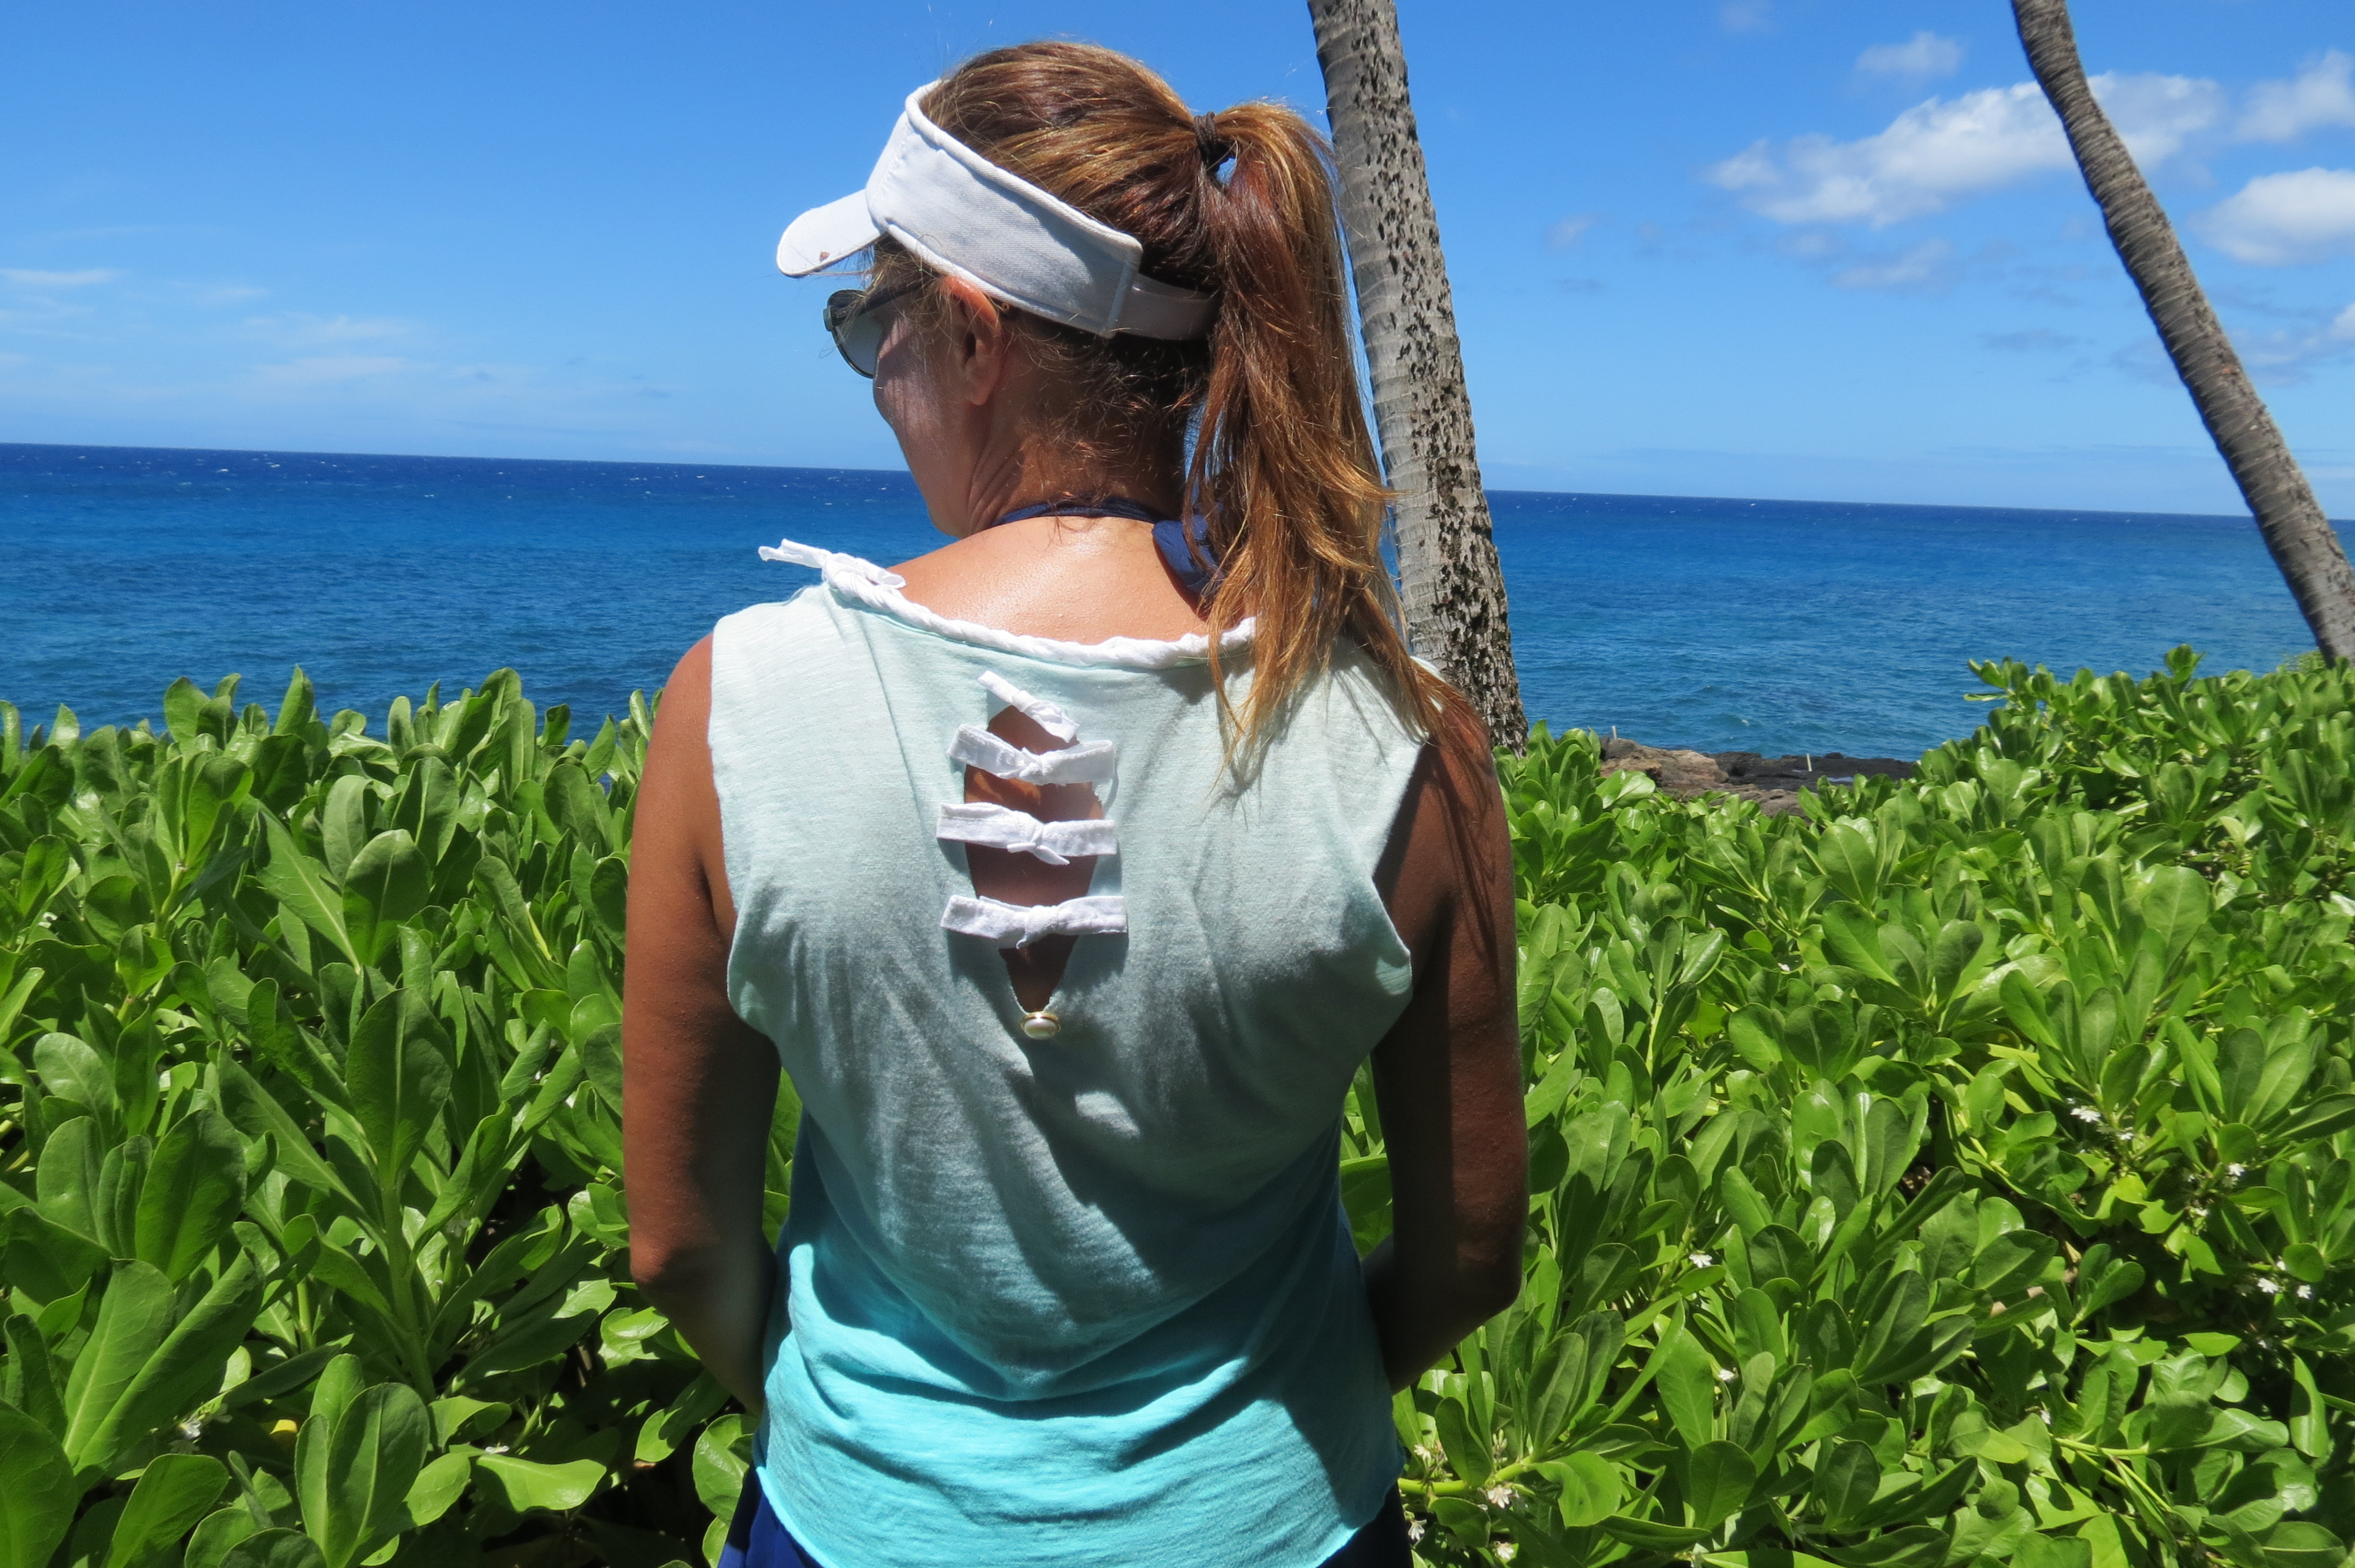
Wearing the re-do of my shirt last week in Hawaii!
In this post I will be describing how to do a Beachy Braided Shirt Re-Do. It’s summer break and I’m in the mood for t-shirts and shorts, beachy dresses and flip flops. I’ve been playing around with t-shirt re-do’s and decided to try a braided type embellishment to a t-shirt I barely ever wear. I got it several years ago from Banana Republic and I can count on one hand how many times I’ve worn it. There is nothing wrong with it, it’s just kind of dull. I spent the week down in Los Gatos while our girls were in camp down there. It’s basically half way to the beach in Santa Cruz from where we live and although it is not on the coast, the town has a laid back and beachy feel to me. I spent my mornings running the trails then had my coffee and did lots of window shopping. I browsed my way through a big range of boutiques, from high end to reasonable and trendy. I was inspired to do a t-shirt re-do after spending all week in the hip and beachy stores in Los Gatos. Here is a pic of my plain old ombre t-shirt from way back when I found buried in my closet:
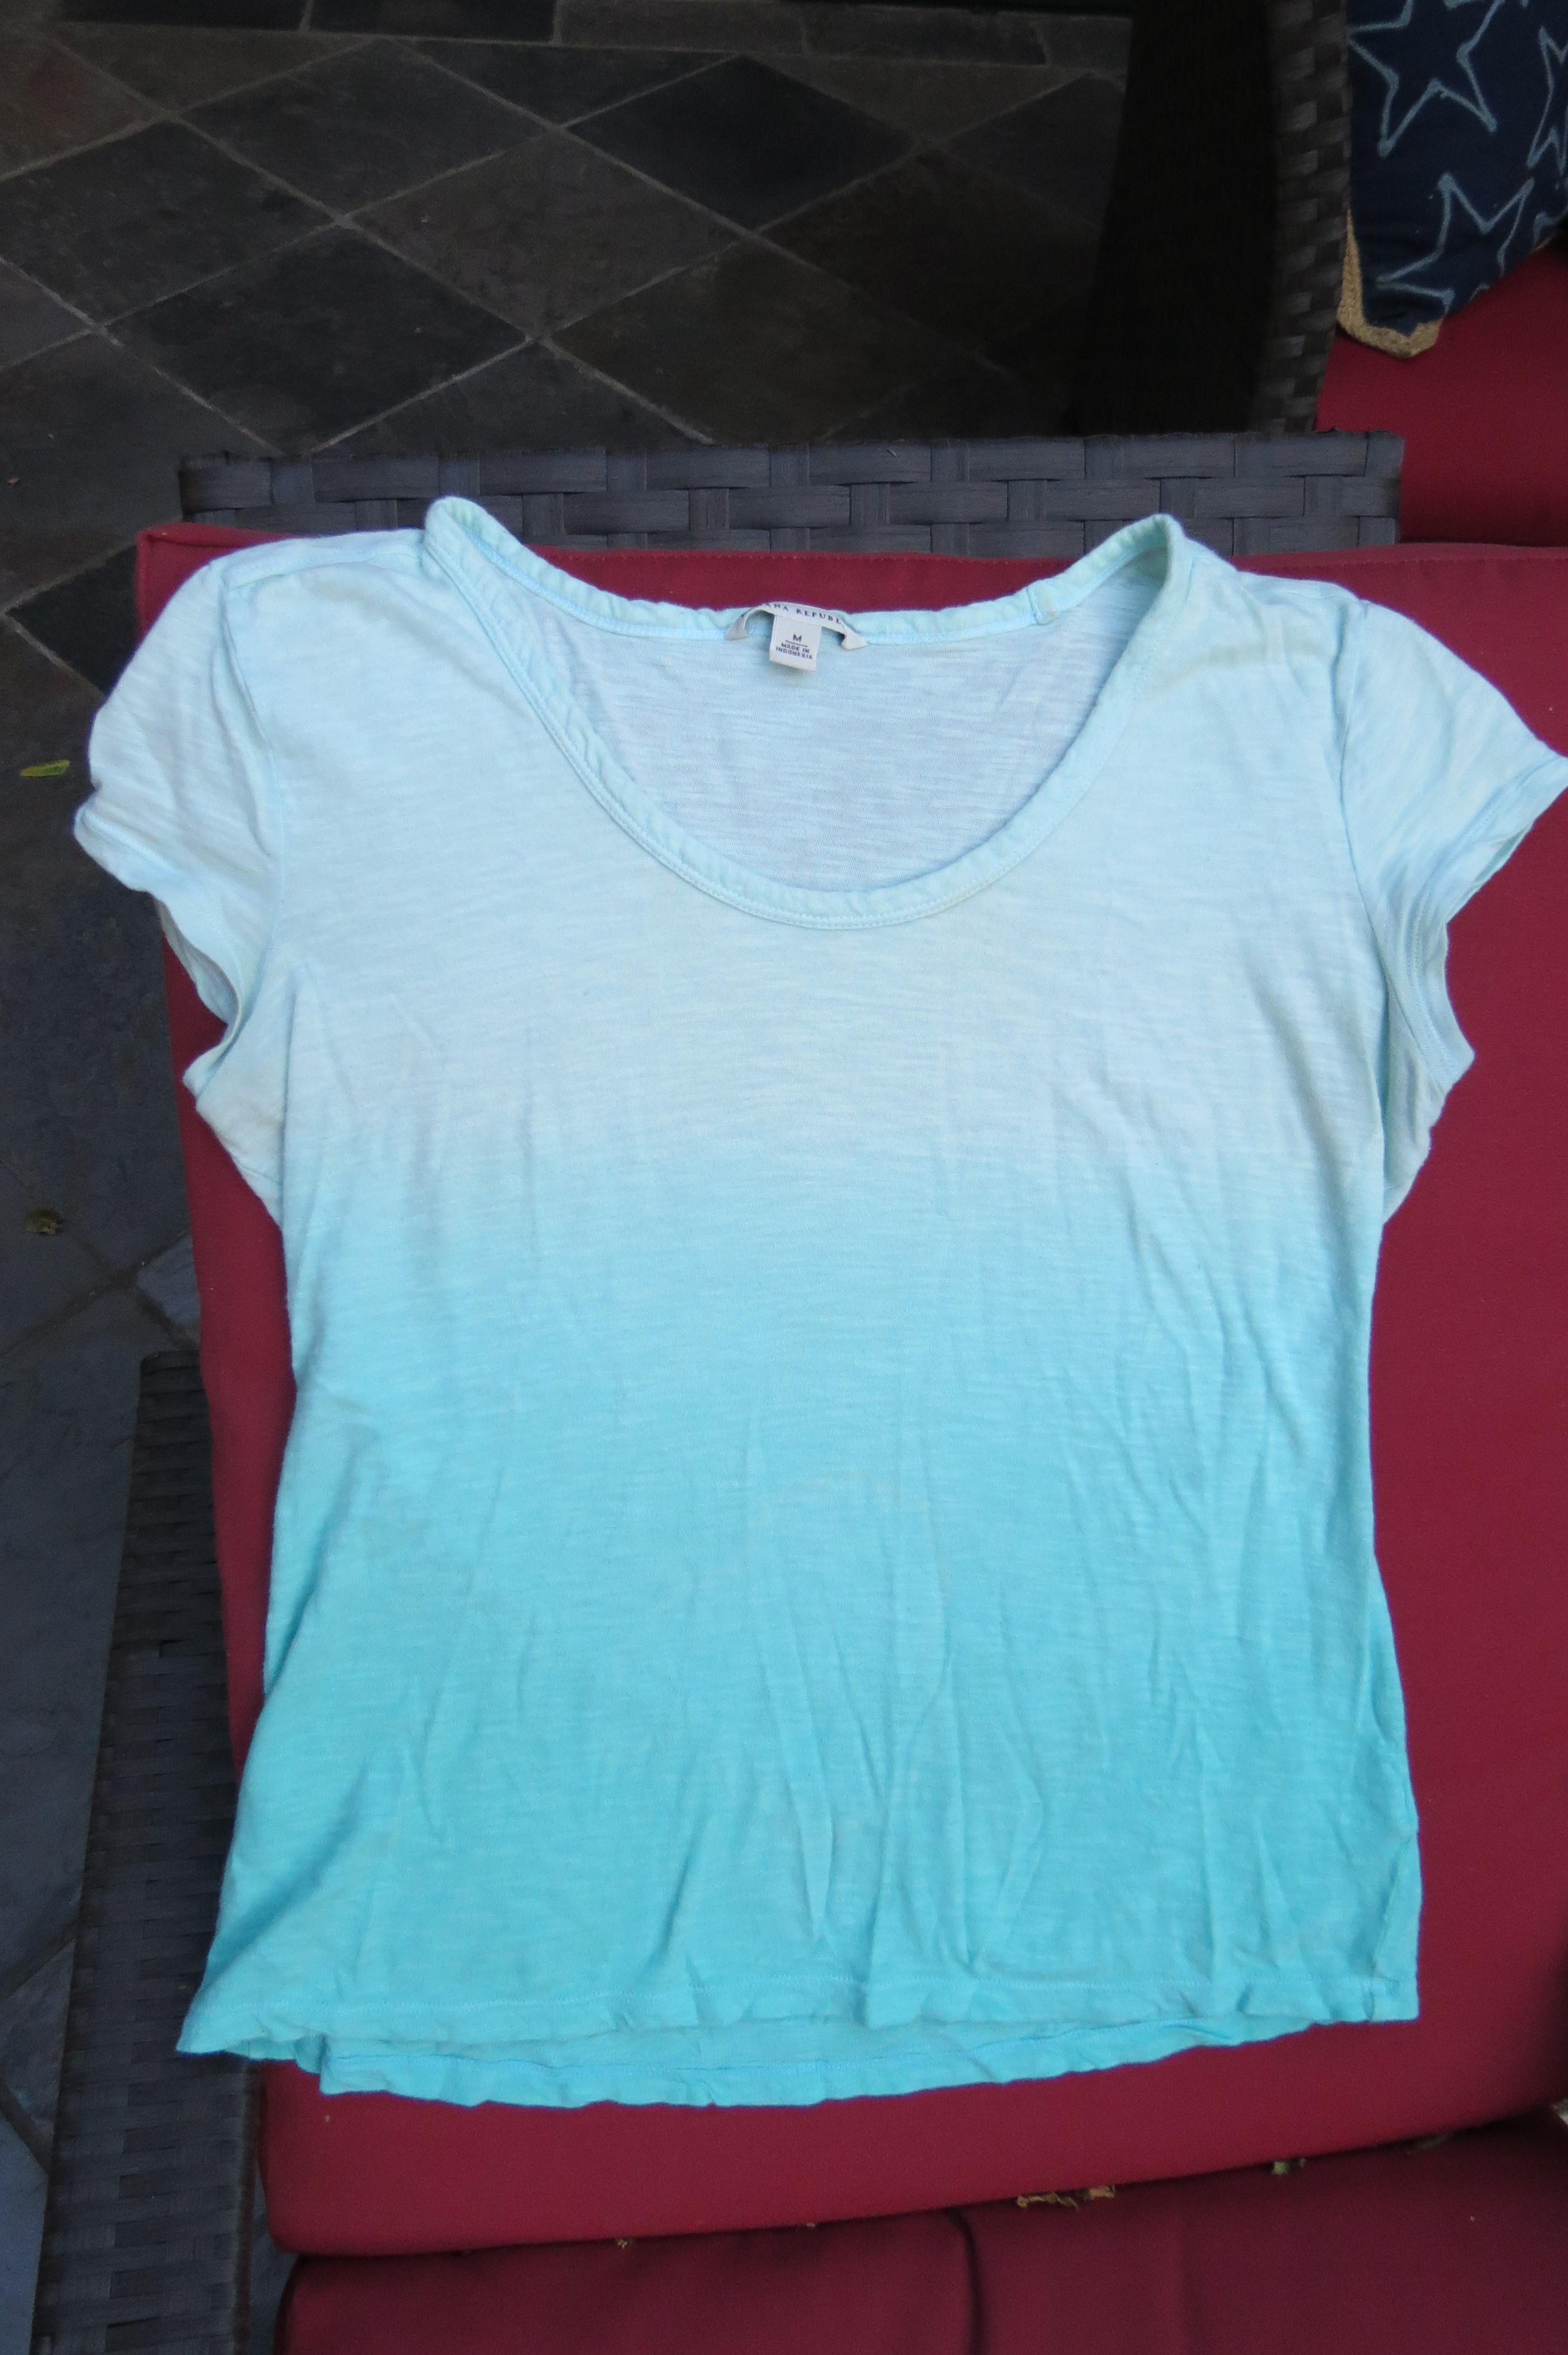
My original, old Banana Republic umbre shirt
You don’t need much in the way of materials for this project:
– t-shirt, one or two depending on how you want to do the colors
– scissors
– needle and thread
– fabric glue or spray adhesive
The steps are as follows: Cut the seamed edge from the bottom of the shirt and then one inch strips off the bottom of a t-shirt. My shirt was a bit long so I cut 2, one inch strips off the bottom. In the end I decided to use a different, plain white t-shirt for my fabric yarn embellishments for a fresher look.
Next, stretch the strips out by pulling each end. Attach the strips to eachother to make them longer. Here is a photo of me cutting the bottom of my t-shirt:
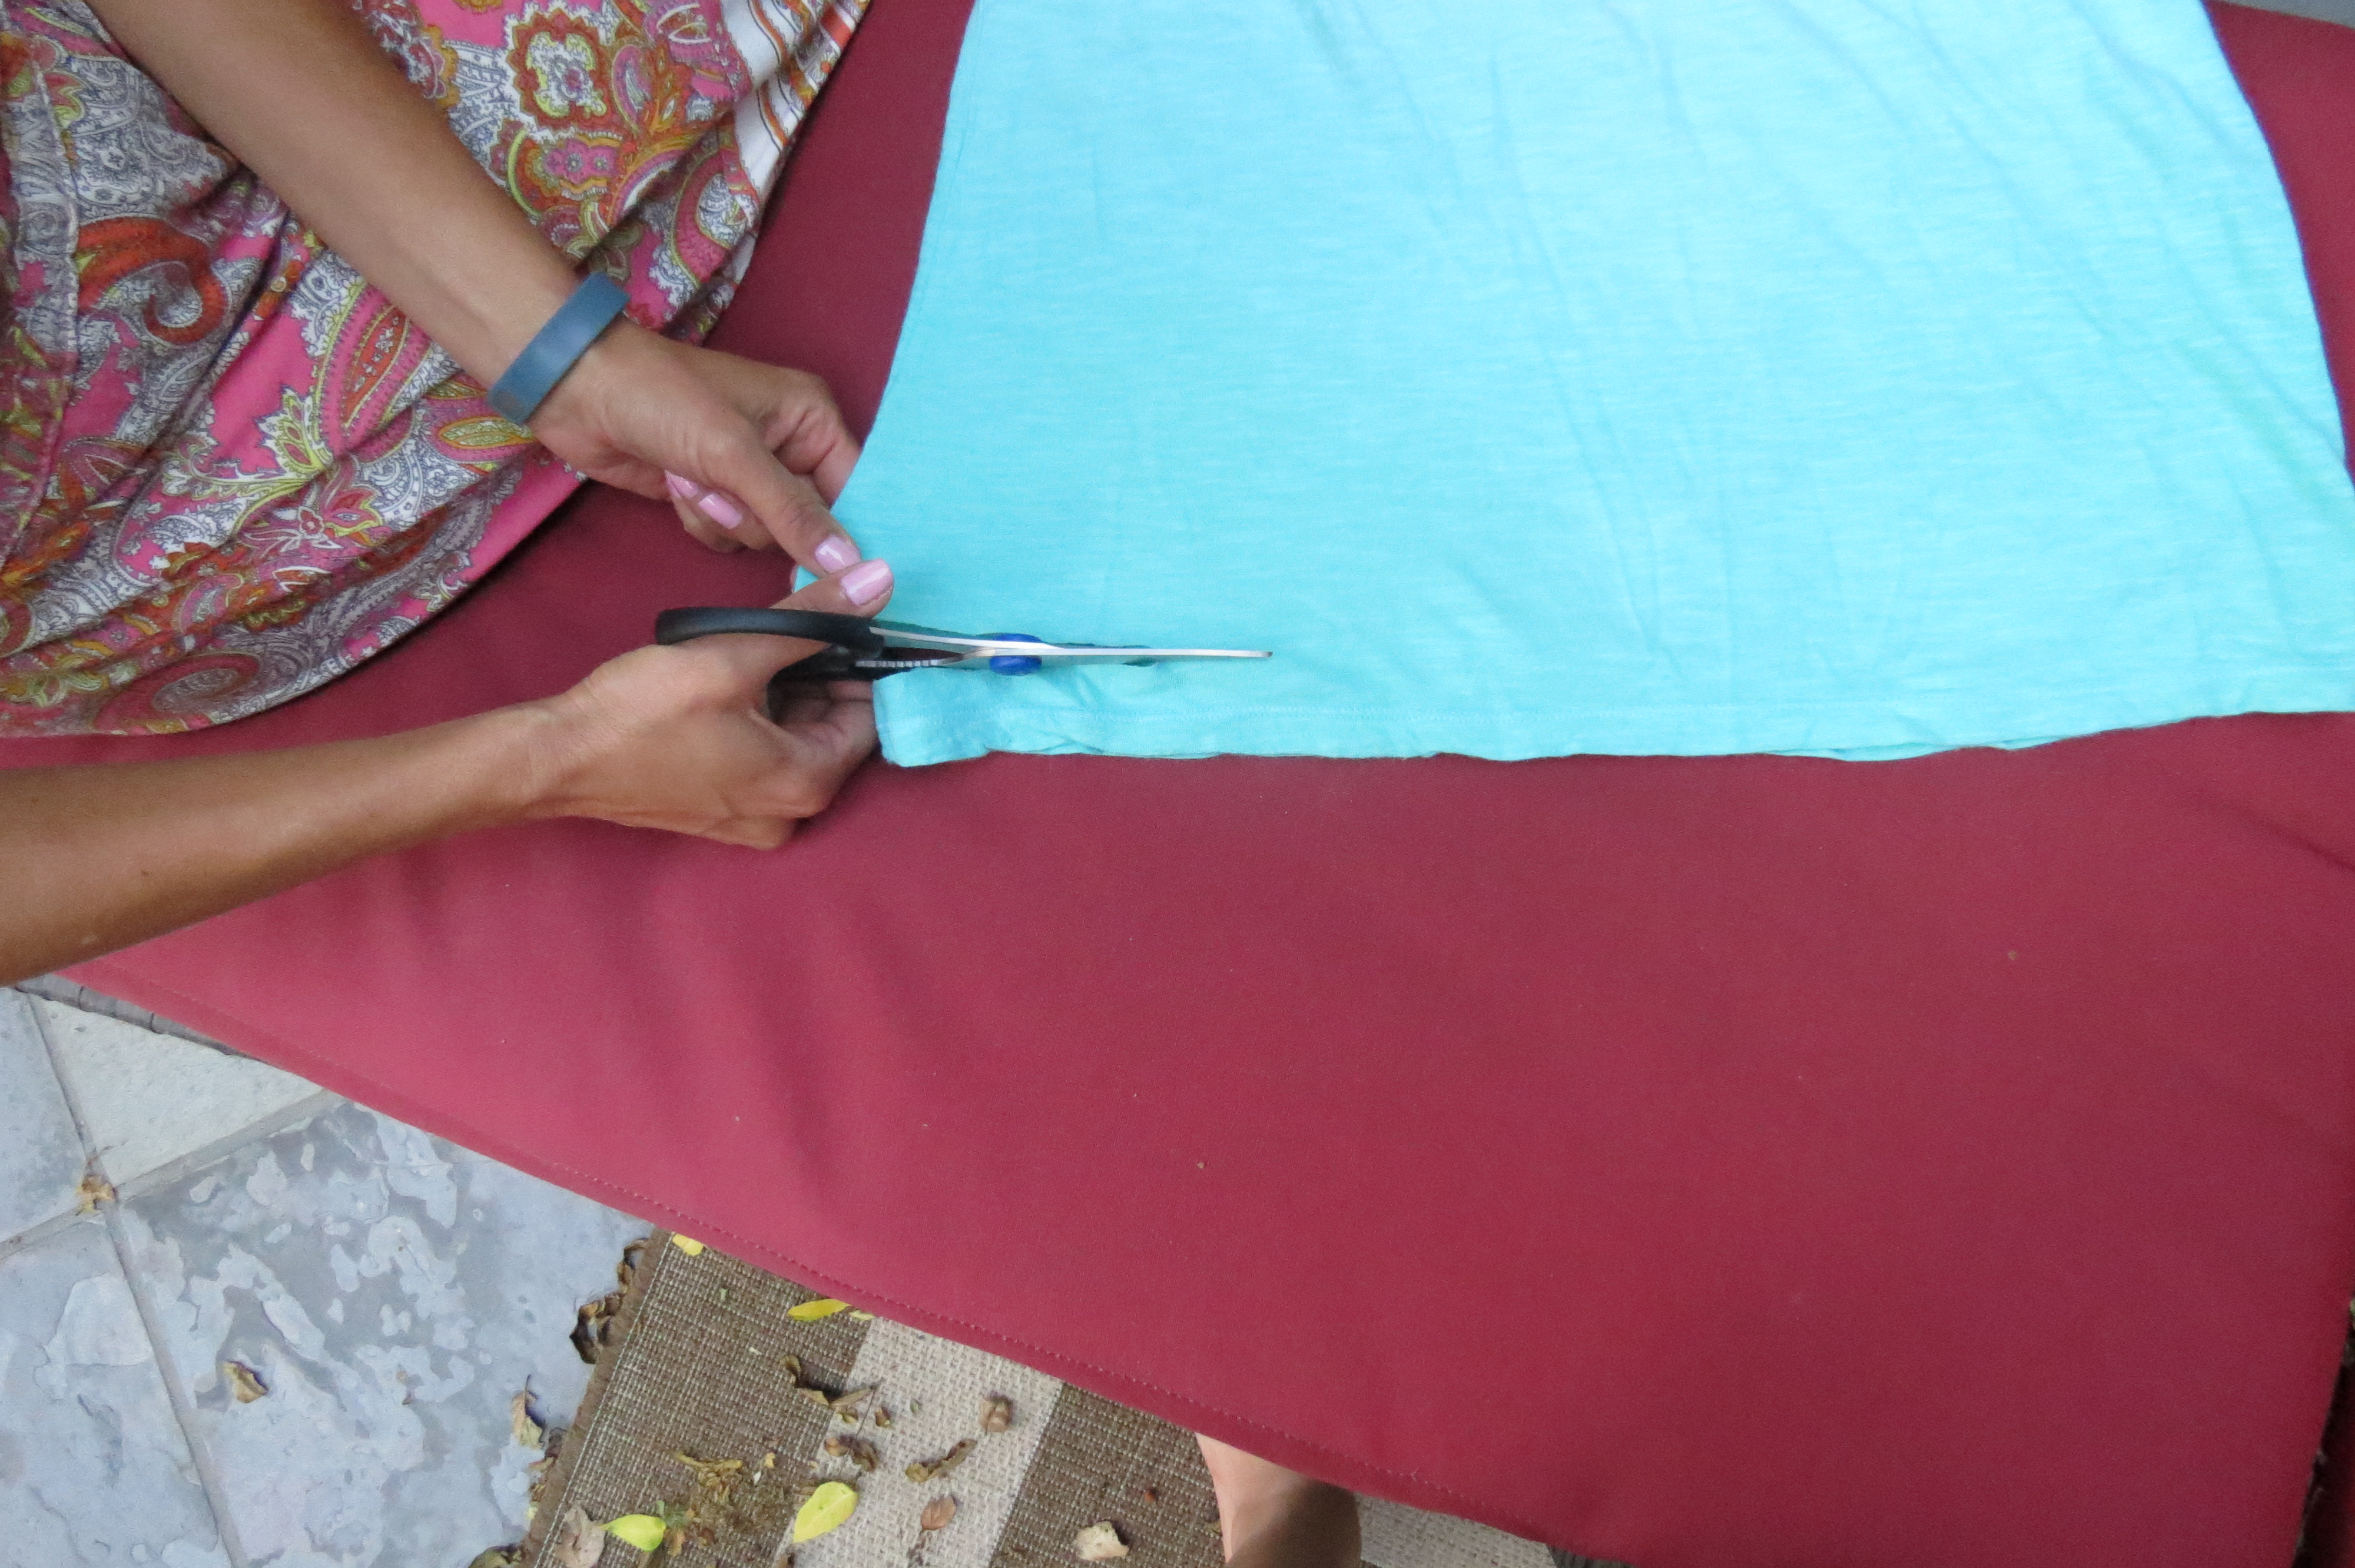
Cutting off fabric from bottom of the shirt
Now it’s time to do some finger chain crochet or crochet with a very large crochet hook. I tried both ways and decided I liked the look of the Hand chain crochet version better, for me it came out more smooth and even.
I had some extra pieces of white t-shirt left over so I decided to make some little white bows. Here is a picture of the chain I made along with the bows:
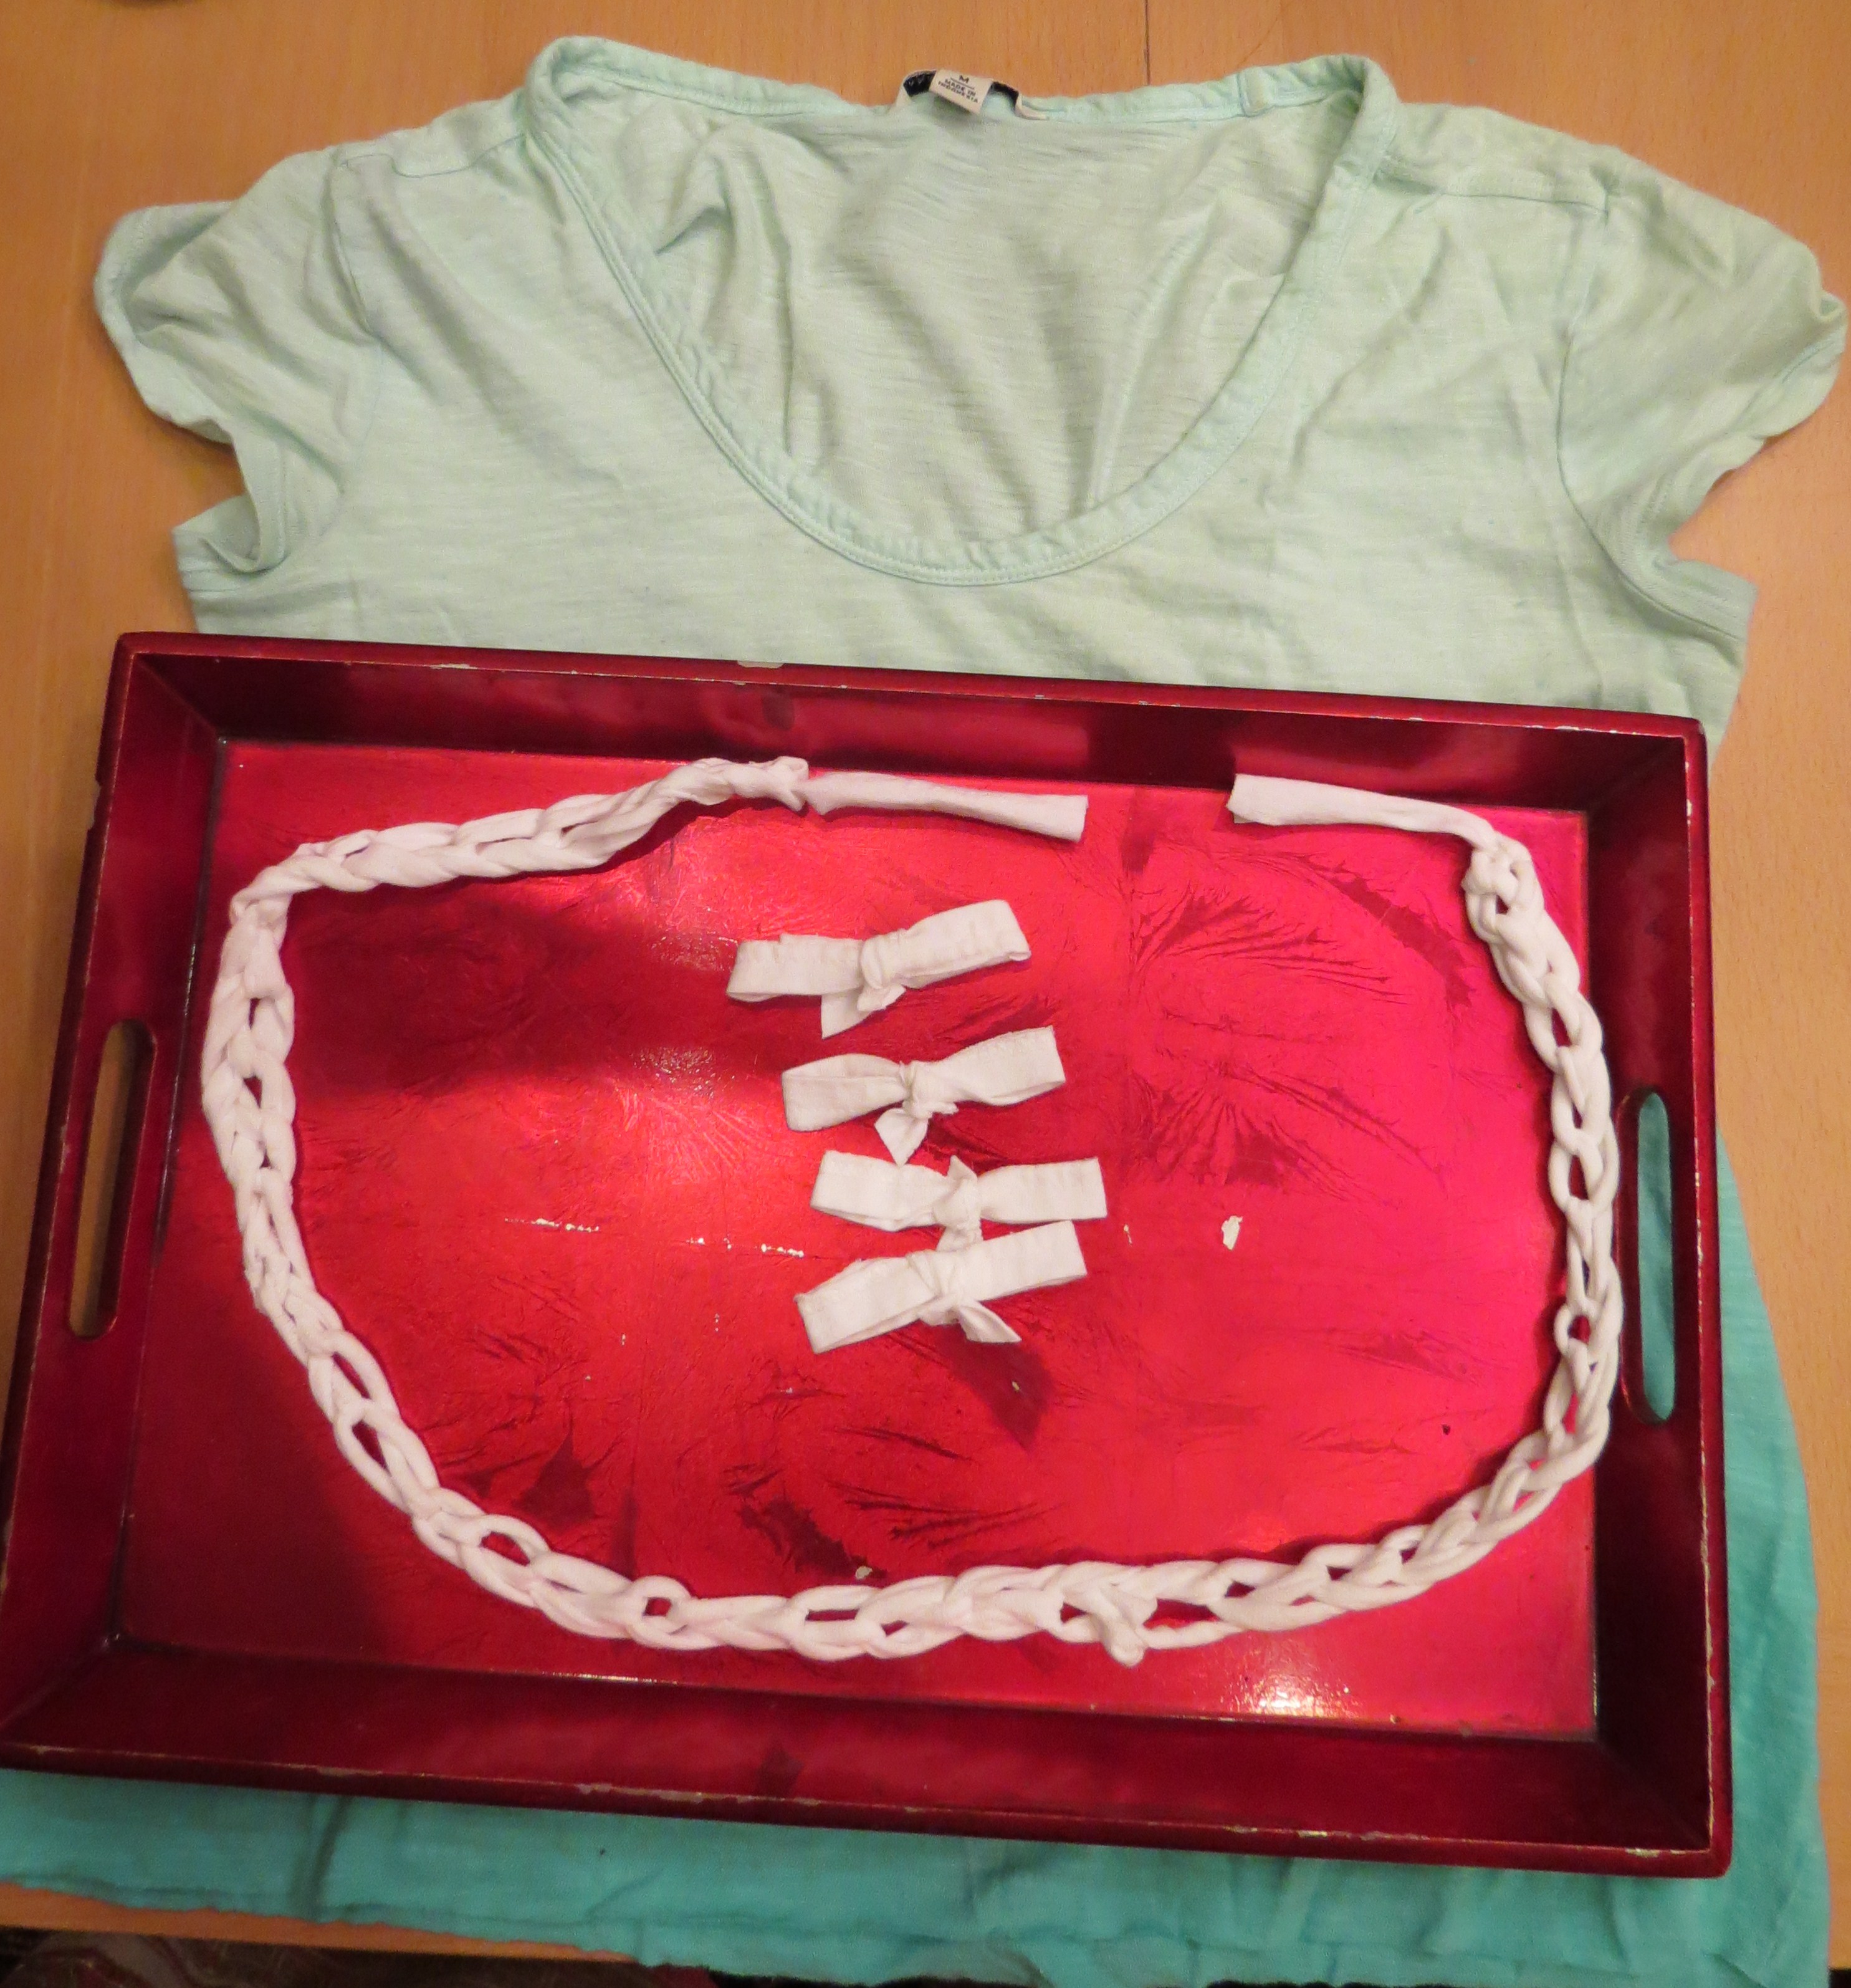
Crochet chain and fabric bows made from cut t-shirt yarn.
To make the bows I simply folded the fabric strip in half leaving one end long enough to tie a knot in the middle.
Next I decided to get trendy and I cut an oval hole out of the back of the shirt. The last step to this cute little t-shirt re-do is sewing the bowsacross the back opening. I used a whip stitch to securely attach the bows to the back of my shirt so that could withstand washing. Here is what the back of the shirt looks like with the bows attached:
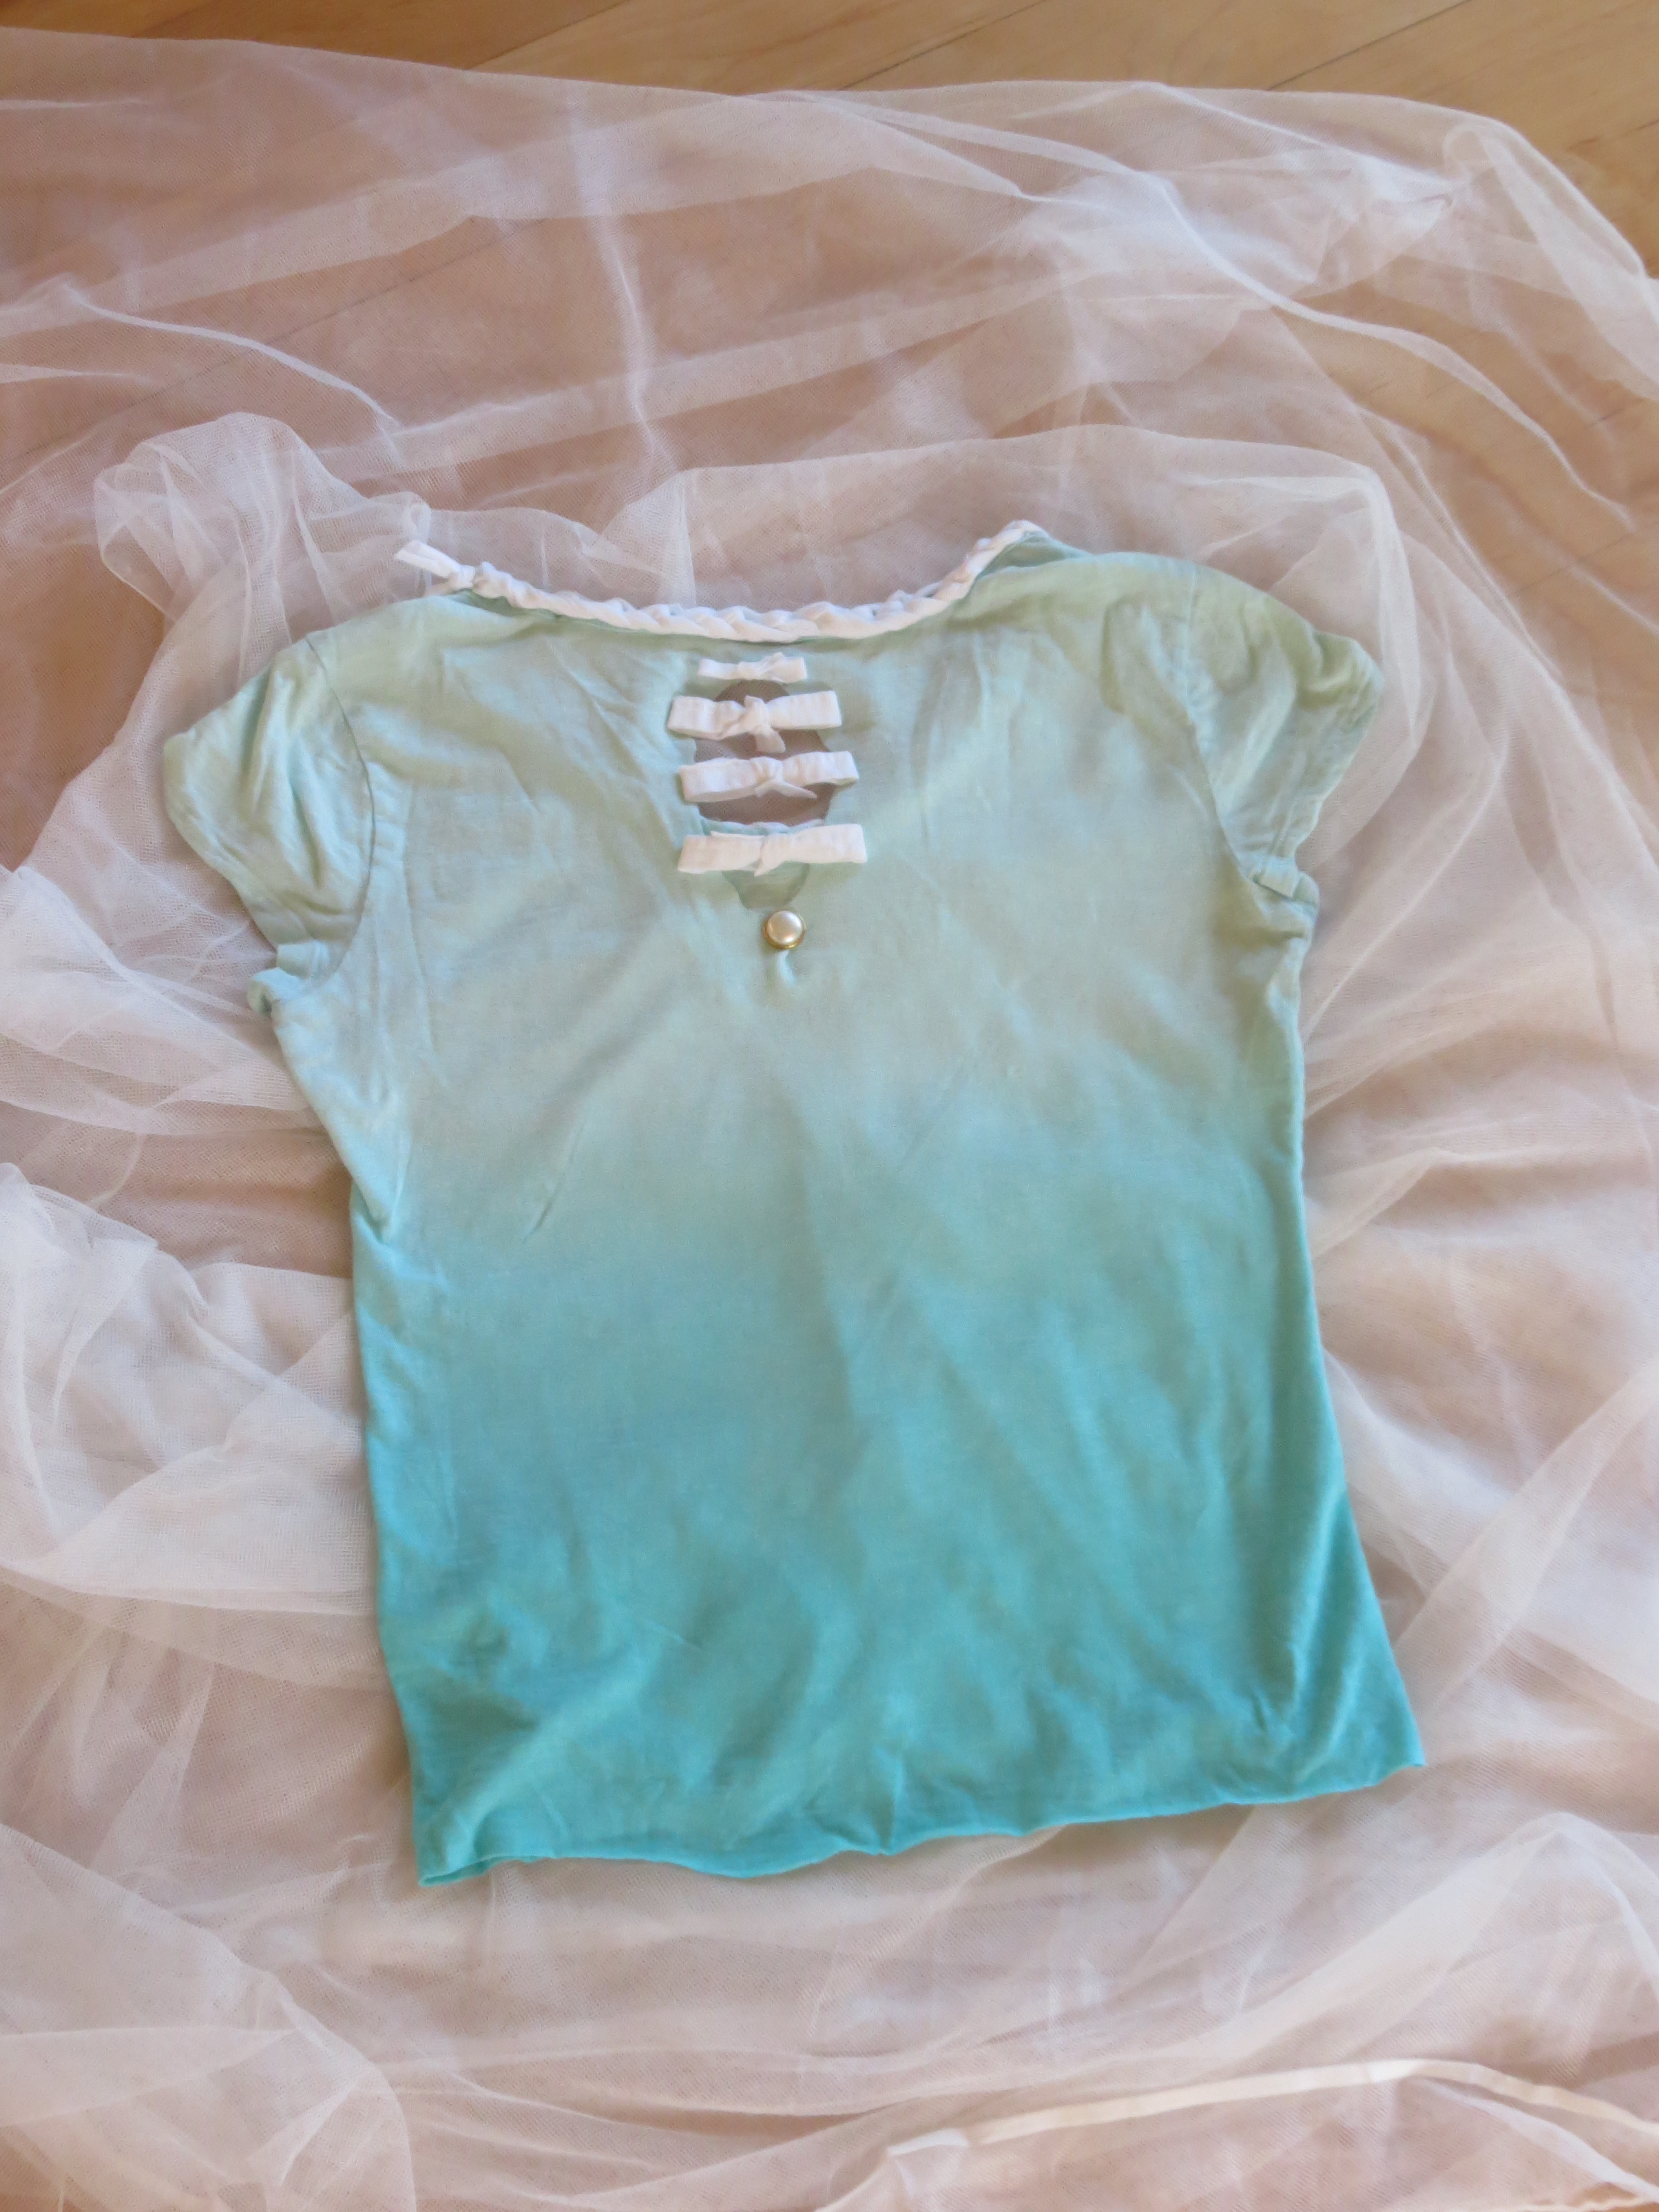
Back of shirt with braid and bows attached
And here is the final Beachy T-shirt Redo!

My pretty girl modelling the final product of our t-shirt re-do project. Isn’t it cute?
Comment to this post, I’d love to hear from you! Are you going to try your own Beachy Braided Shirt Re-Do? Hope so! Subscribe to the blog – I have a fun post coming, filmed in Hawaii…can’t wait to share. x/o Bita
you can create virtually anywhere…
