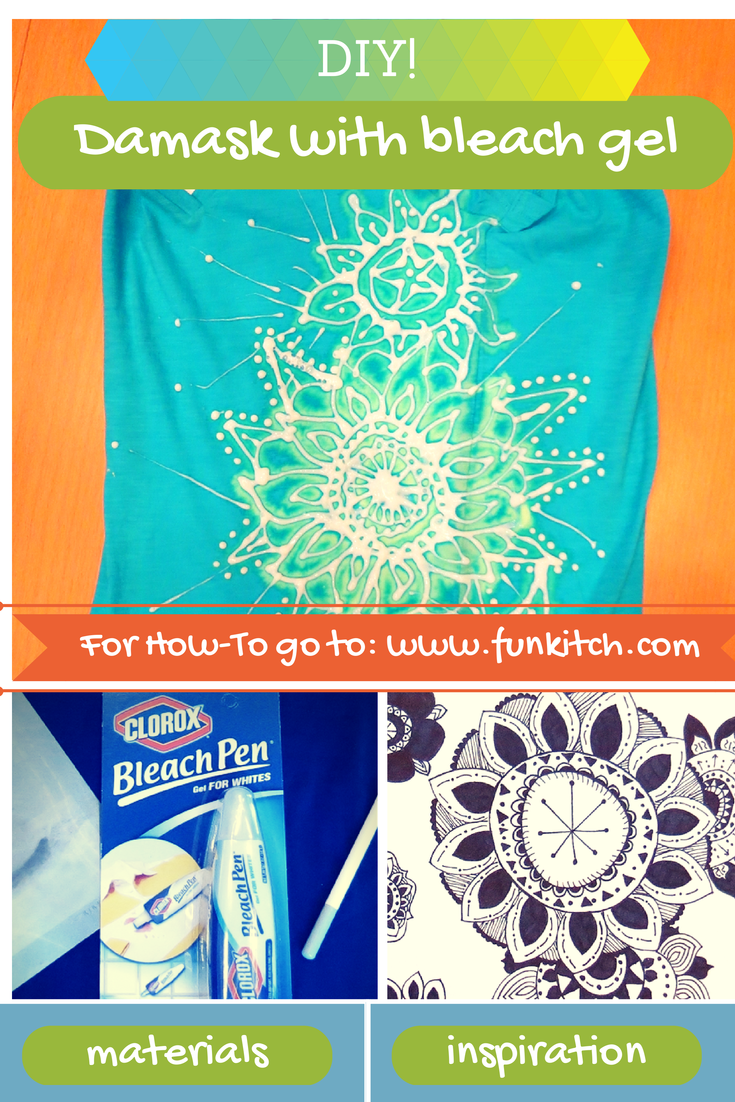
Floral damask bleach gel design

Getting ready for bleach gel project
In this post I will teach you how to make a CLOROX Bleach Pen Design T-Shirt. You may have used this bleach product to remove stains from white clothes in your laundry. If you haven’t used a bleach pen before, let me tell you what it’s like. Basically the consistency is like a gel that squeezes out of a tube with a small opening. It comes out almost like puffy paint.
TIPS FOR USING CLOROX BLEACH PENS FOR ART DESIGNS ON T-SHIRTS:
CLOROX bleach pens are intended for laundry use to get stains out of white items. In this tutorial we are using CLOROX Bleach pens for art design on T-shirts. Bleach pens are fairly easy to use. The tricky part is leaving the bleach on for the right amount of time. Not long enough and your design won’t show up. Too long and the bleach will bleed all together and look like a laundry mistake!
FOR BEST RESULTS,
Use a shirt that is 100% cotton (or close to it)
Pick a color t-shirt that is of a medium shade/color. Too light of a color (like pastels) as well as too dark of a color (dark blue) may pose timing challenges. *Do as I say, not as I do – in this tutorial/video I used a dark blue shirt which proved difficult to work with. In the past I have used lavendar, pink, orange, light turquoise and peach – process time for all these shirts was 8 minutes on average.
The thickness of the fabric is also important. Pick a fabric that is on the thinner side. Thinner fabrics will bleach more quickly which is what you want – slow processing fabrics have the risk of the bleach bleeding all together, blurring your design pattern all together.
WHERE I FIND THE BEST SHIRTS FOR THIS PROJECT:
*Target has a ‘Mossimo Supply Co.’ brand t-shirt that is 100% cotton. I can find this type of shirt at Target for $12-15. The fabric is light weight and bleaches easily and quickly. I recommend using this shirt or something similar for the best results.
…while you’re at Target grab a few CLOROX bleach pens – they run right around 3 bucks and they are great to have around even if you don’t need all 3 for the shirt project.
Shake the bleach down to the tip/opening of the pen a couple times. Air bubbles are unavoidable but shaking the pen down will reduce the air pockets for a smoother flow of bleach. If you get an air bubble as you are tracing your design, just keep going. If it bothers you dab it with a wet tissue wrapped around the tip of a pencil and it will clean off before it sets in.
DESIGN INSPIRATION:
My design inspiration for this CLOROX Bleach Pen Design T-Shirt came from a couple drawings our older daughter, Leyla dreamt up. Ley has been into drawing lately and she likes to draw intricate shapes with circles and lines. The designs are round and floral with dots and shapes and and lots of details. Here is a picture of the drawings that inspired my design:
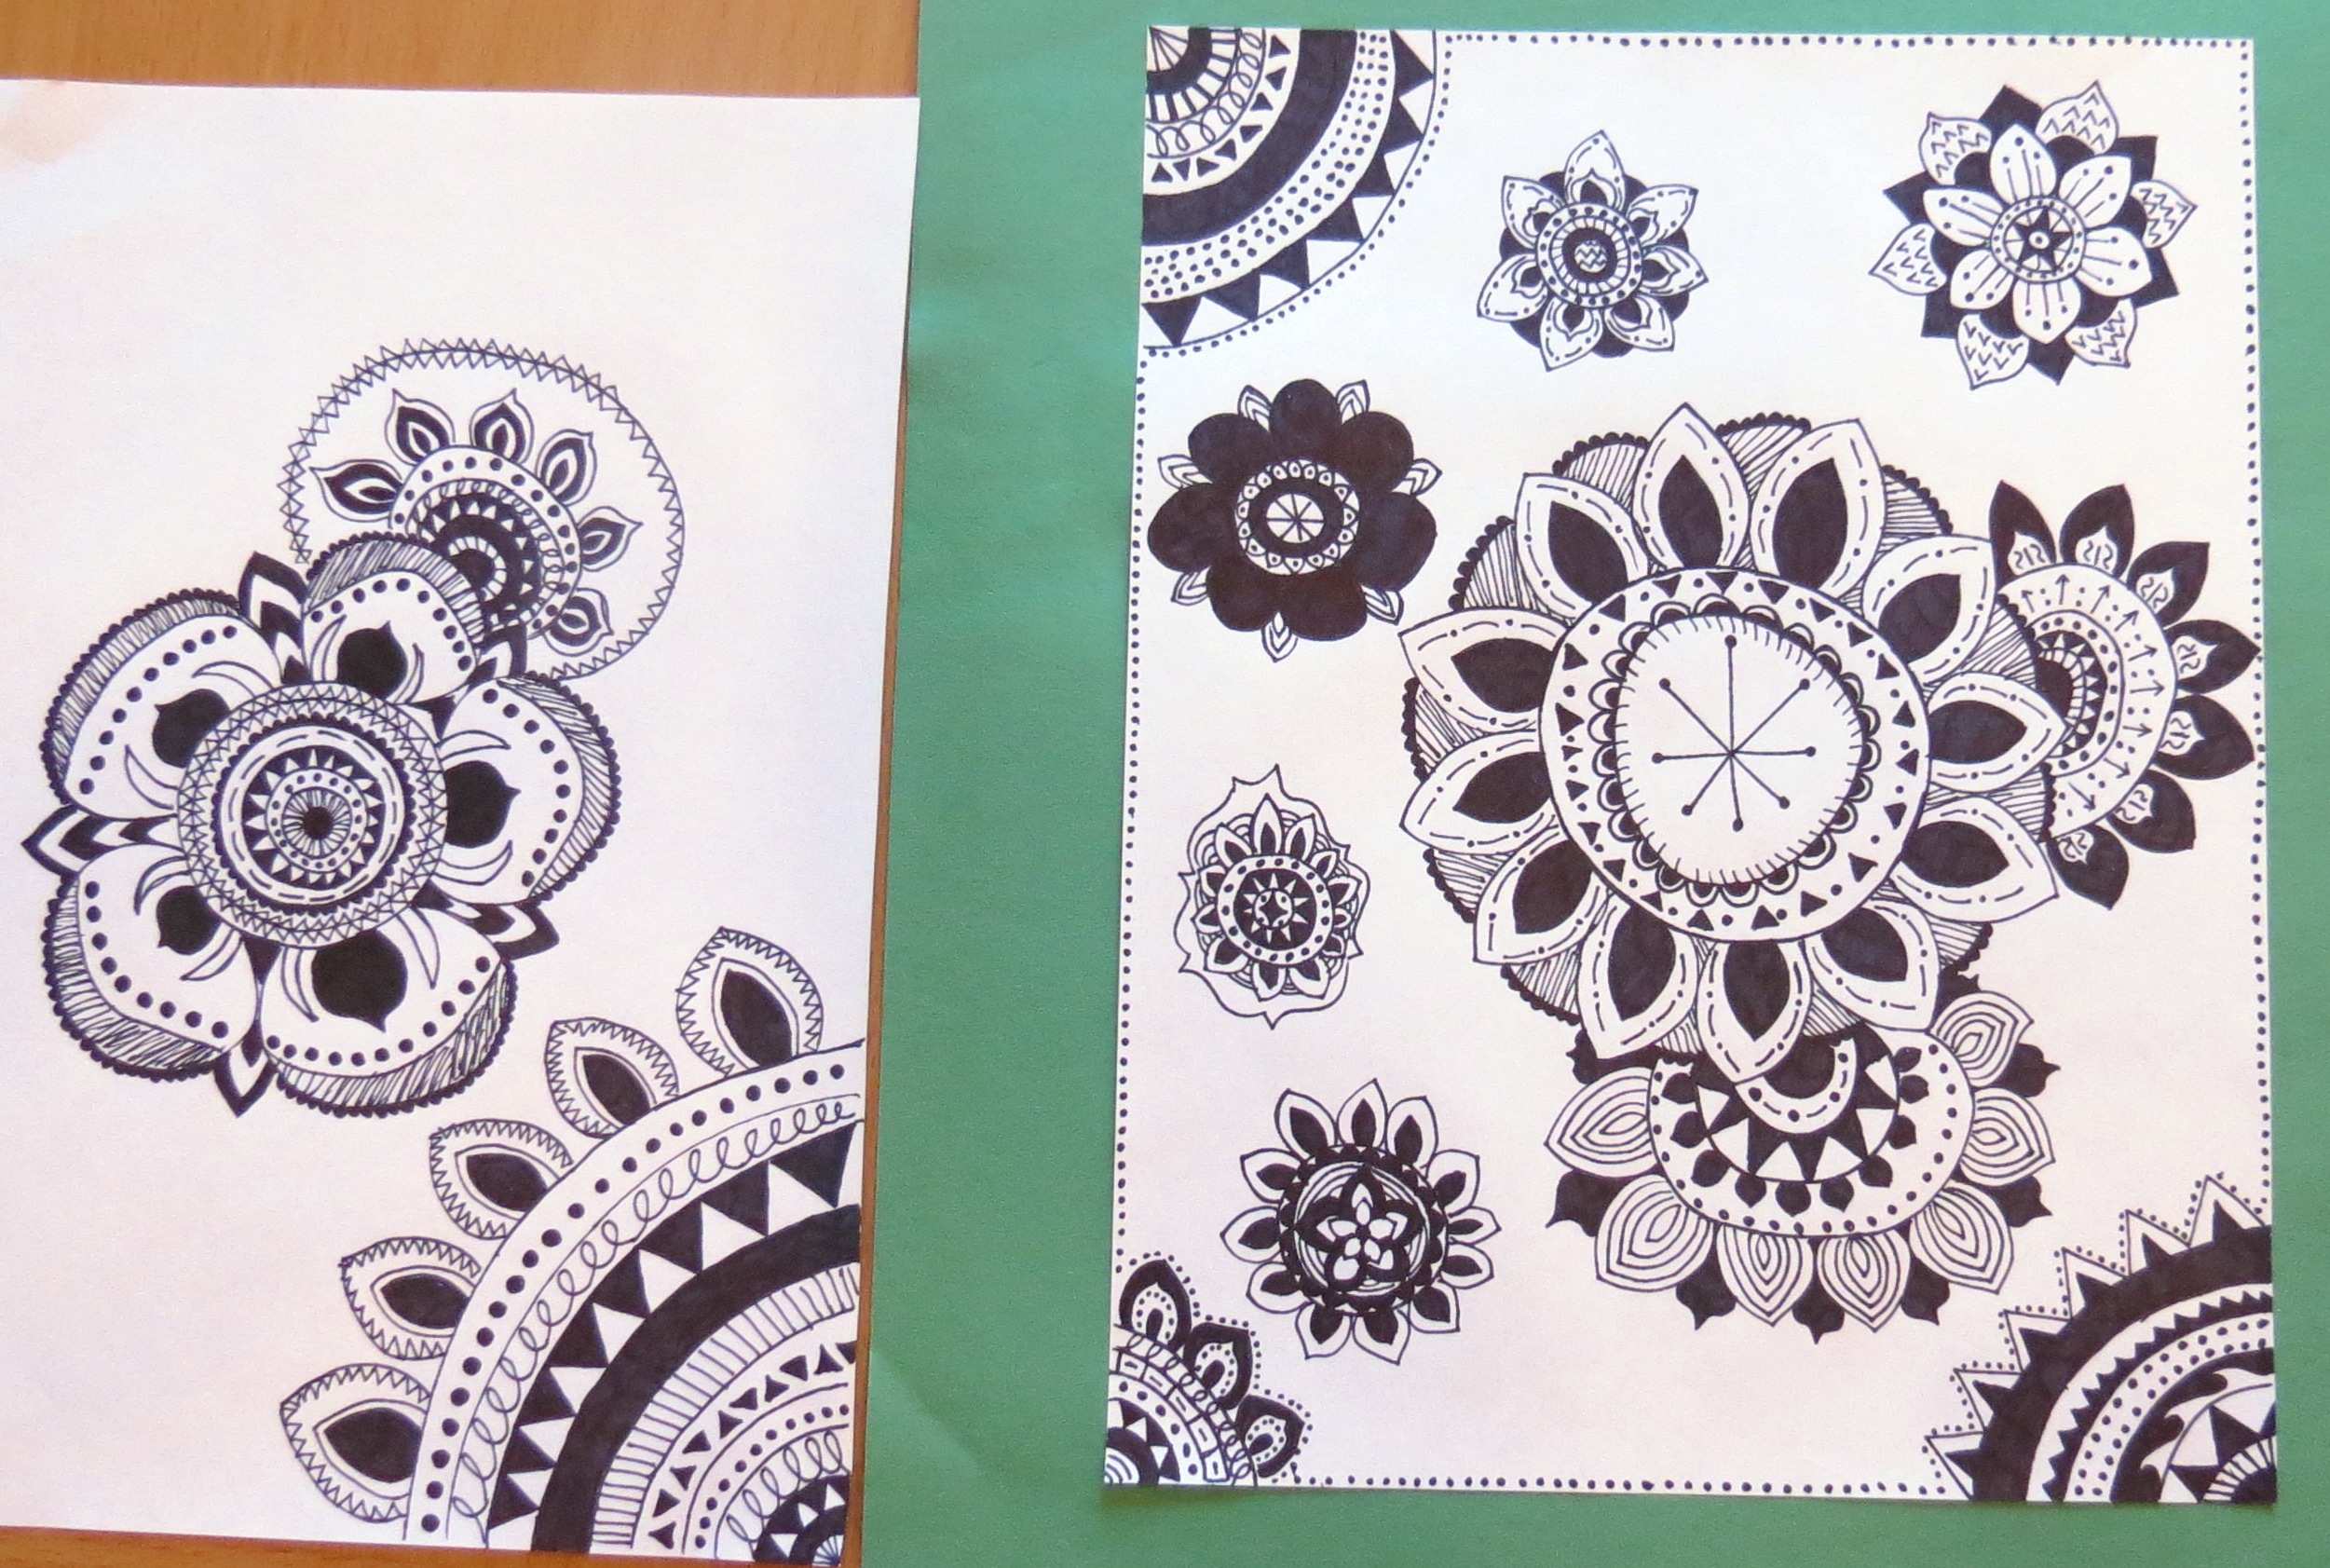
Floral drawing which inspired my tshirt design by our daughter Leyla
I knew from experience that I would not be able to replicate the level of detail of my daughters pictures but I used them as my general guide.
Here is a picture of the materials you will need:
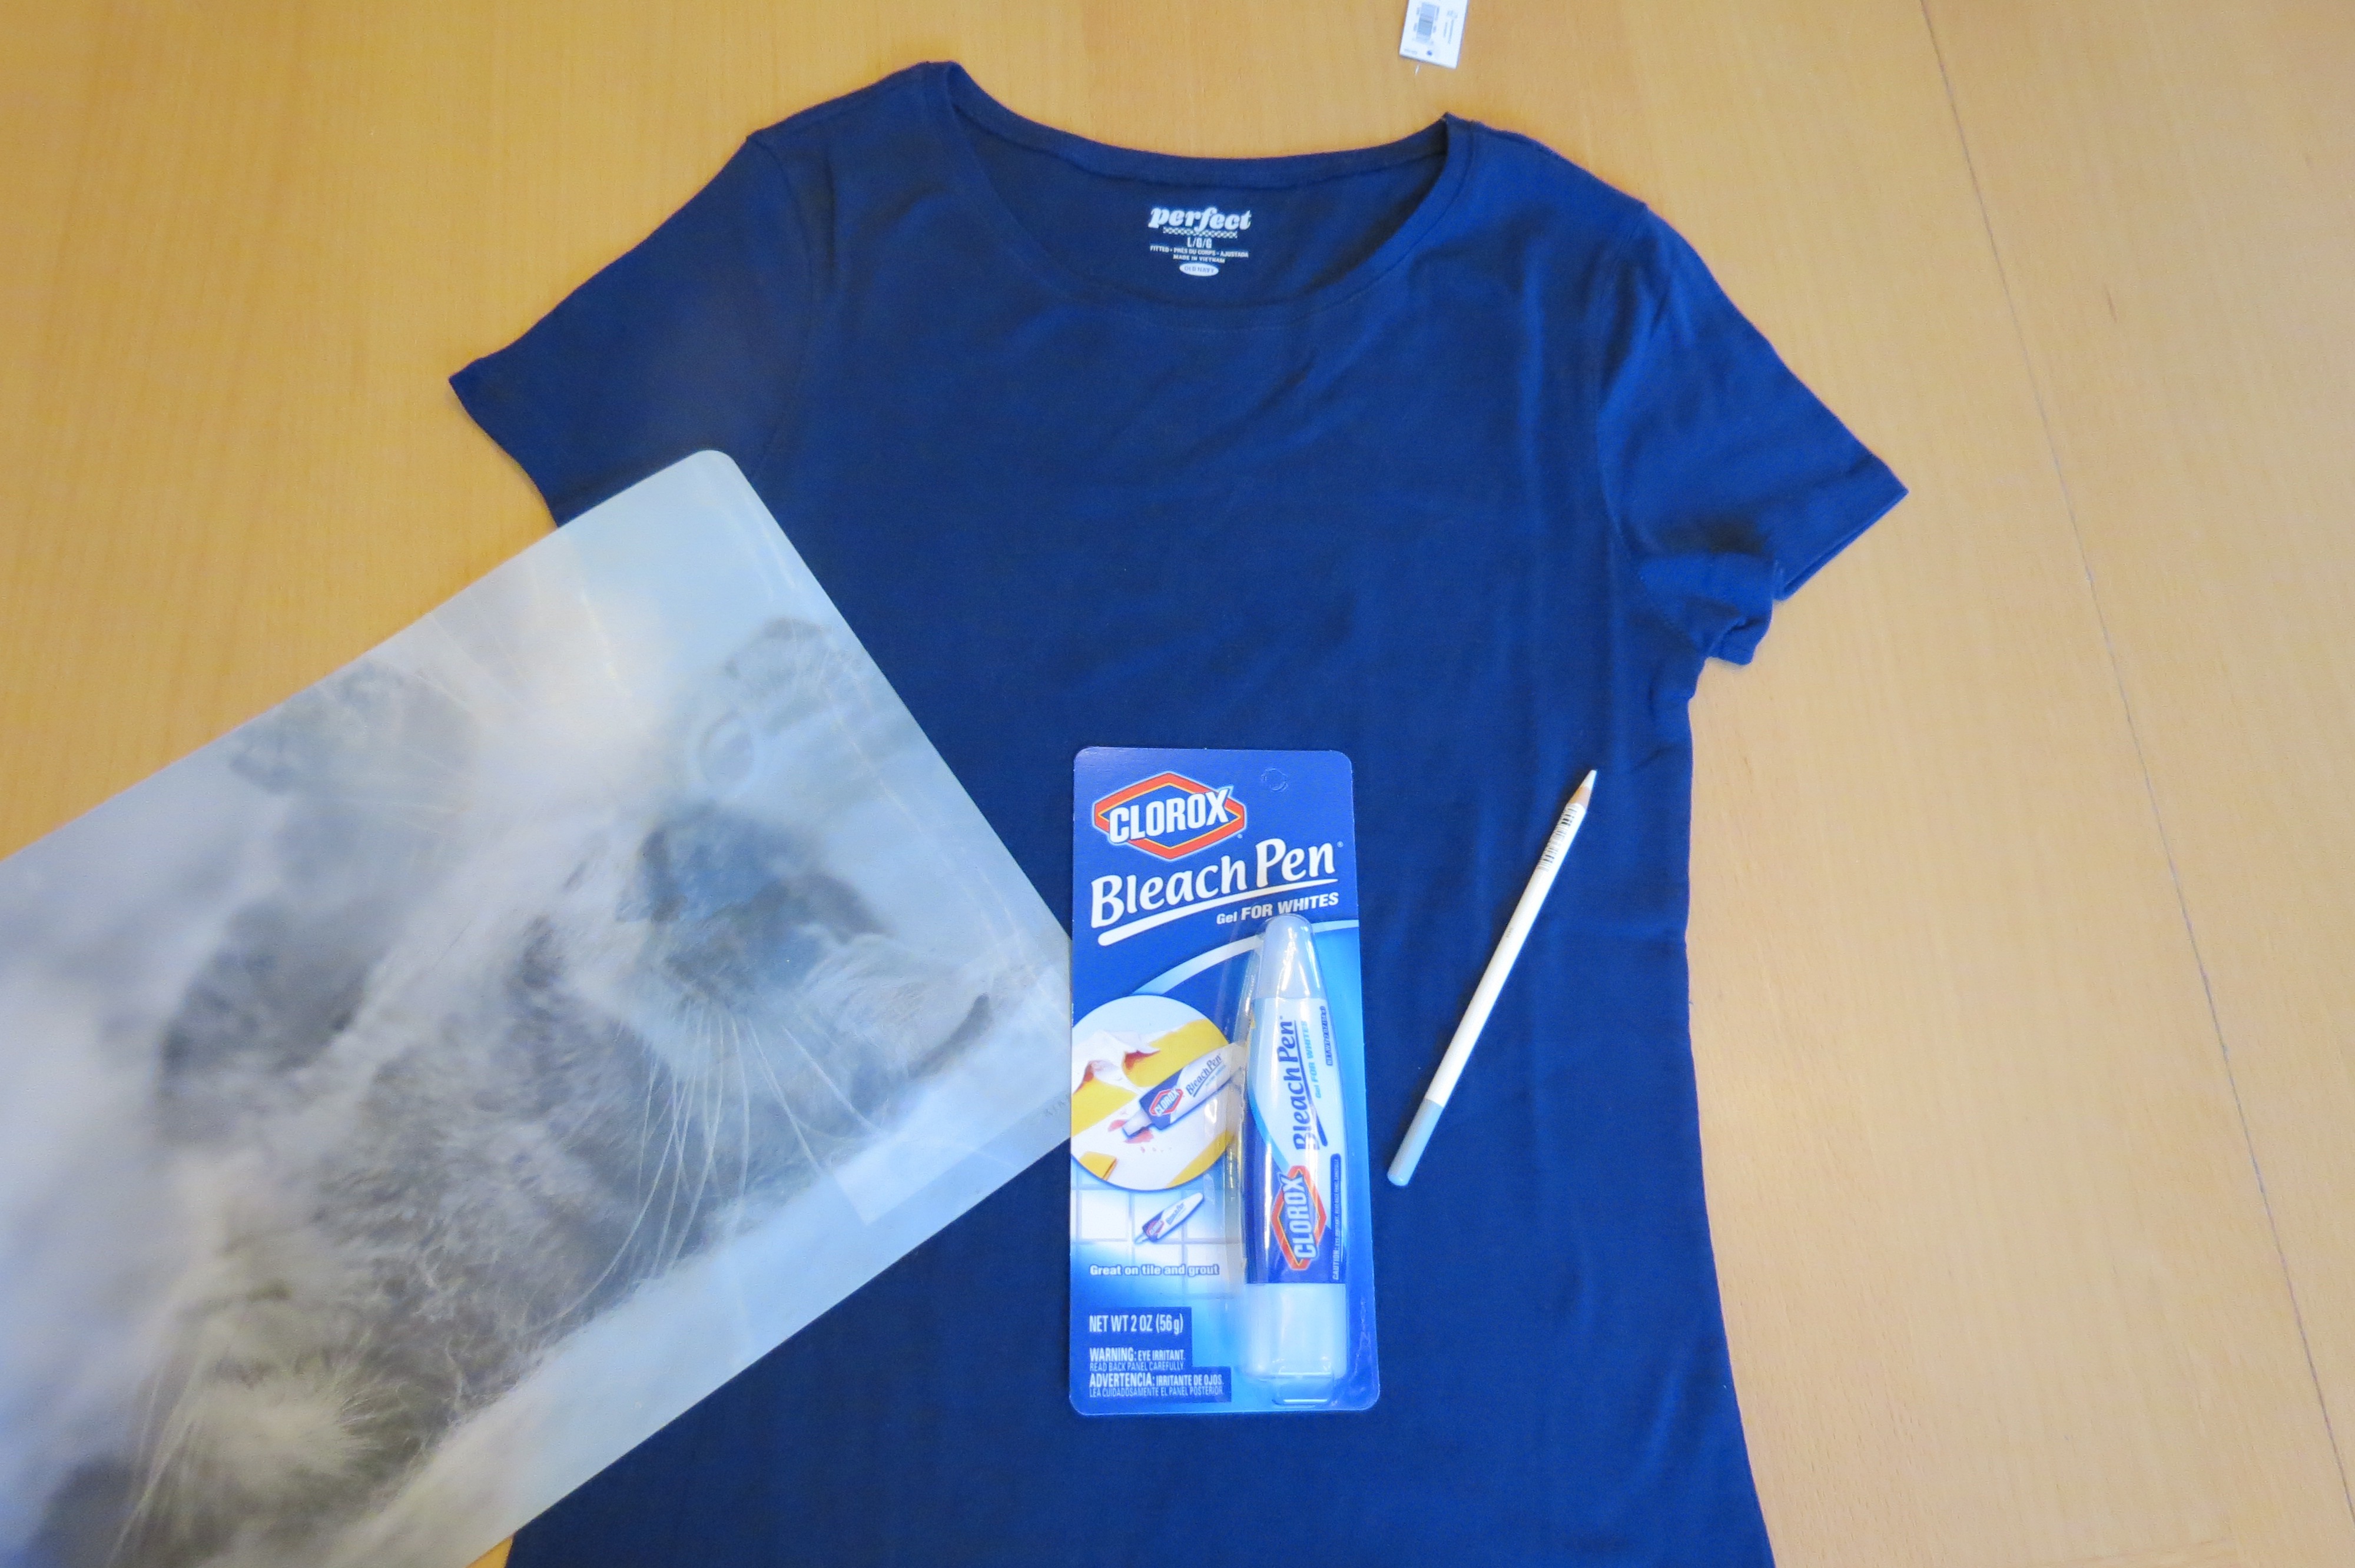
Materials needed for bleach t-shirt
MATERIALS:
*Cotton t-shirt in a medium shade/color, not to light and not too dark (cotton blend will work – higher concentration of cotton works best)
*CLOROX bleach pen(s) – I typically use about 3 for this project. I pick mine up from Target in the laundry section for about $3 a piece
*Chalk or washable thin marker for sketching on the shirt (or you can bleach free hand – I usually do)
*Cardboard or placemat for inside the shirt
**TEST THE FABRIC FIRST
I would recommend experimenting with old colored t-shirts you may have around the house. Remember that lighter colors won’t take as long to process as darker colors. The shirt I sleep in is lavender and took maybe 8 minutes for the bleach to set in. You can do a small test patch on the back of the shirt near the bottom to test how long it will take to bleach.
STEPS:
– Find a design to replicate or draw one of your own on paper
– Sketch the design onto the t-shirt with chalk or washable marker
– Slip cardboard inside shirt underneath area to be bleached
– Prepare bleach pen by shaking it down a couple times (helps reduce bubbles)
– Use bleach pen to apply bleach over the pattern of your choice that you have sketched on with chalk
– Allow the bleach to set into the shirt – takes 8-10 minutes on average with the right type of shirt
– Rinse the bleach off the shirt
– Dry shirt in dryer – this will set the bleach color
Here are a couple of examples of how the bleach gel looks after it’s been applied to the fabric of the shirt. I like to turn the shirt and do the design way over on the side of the shirt so it shows a little on the front and the back. Following these photos you will find a video giving you a quick visual of the steps described above:
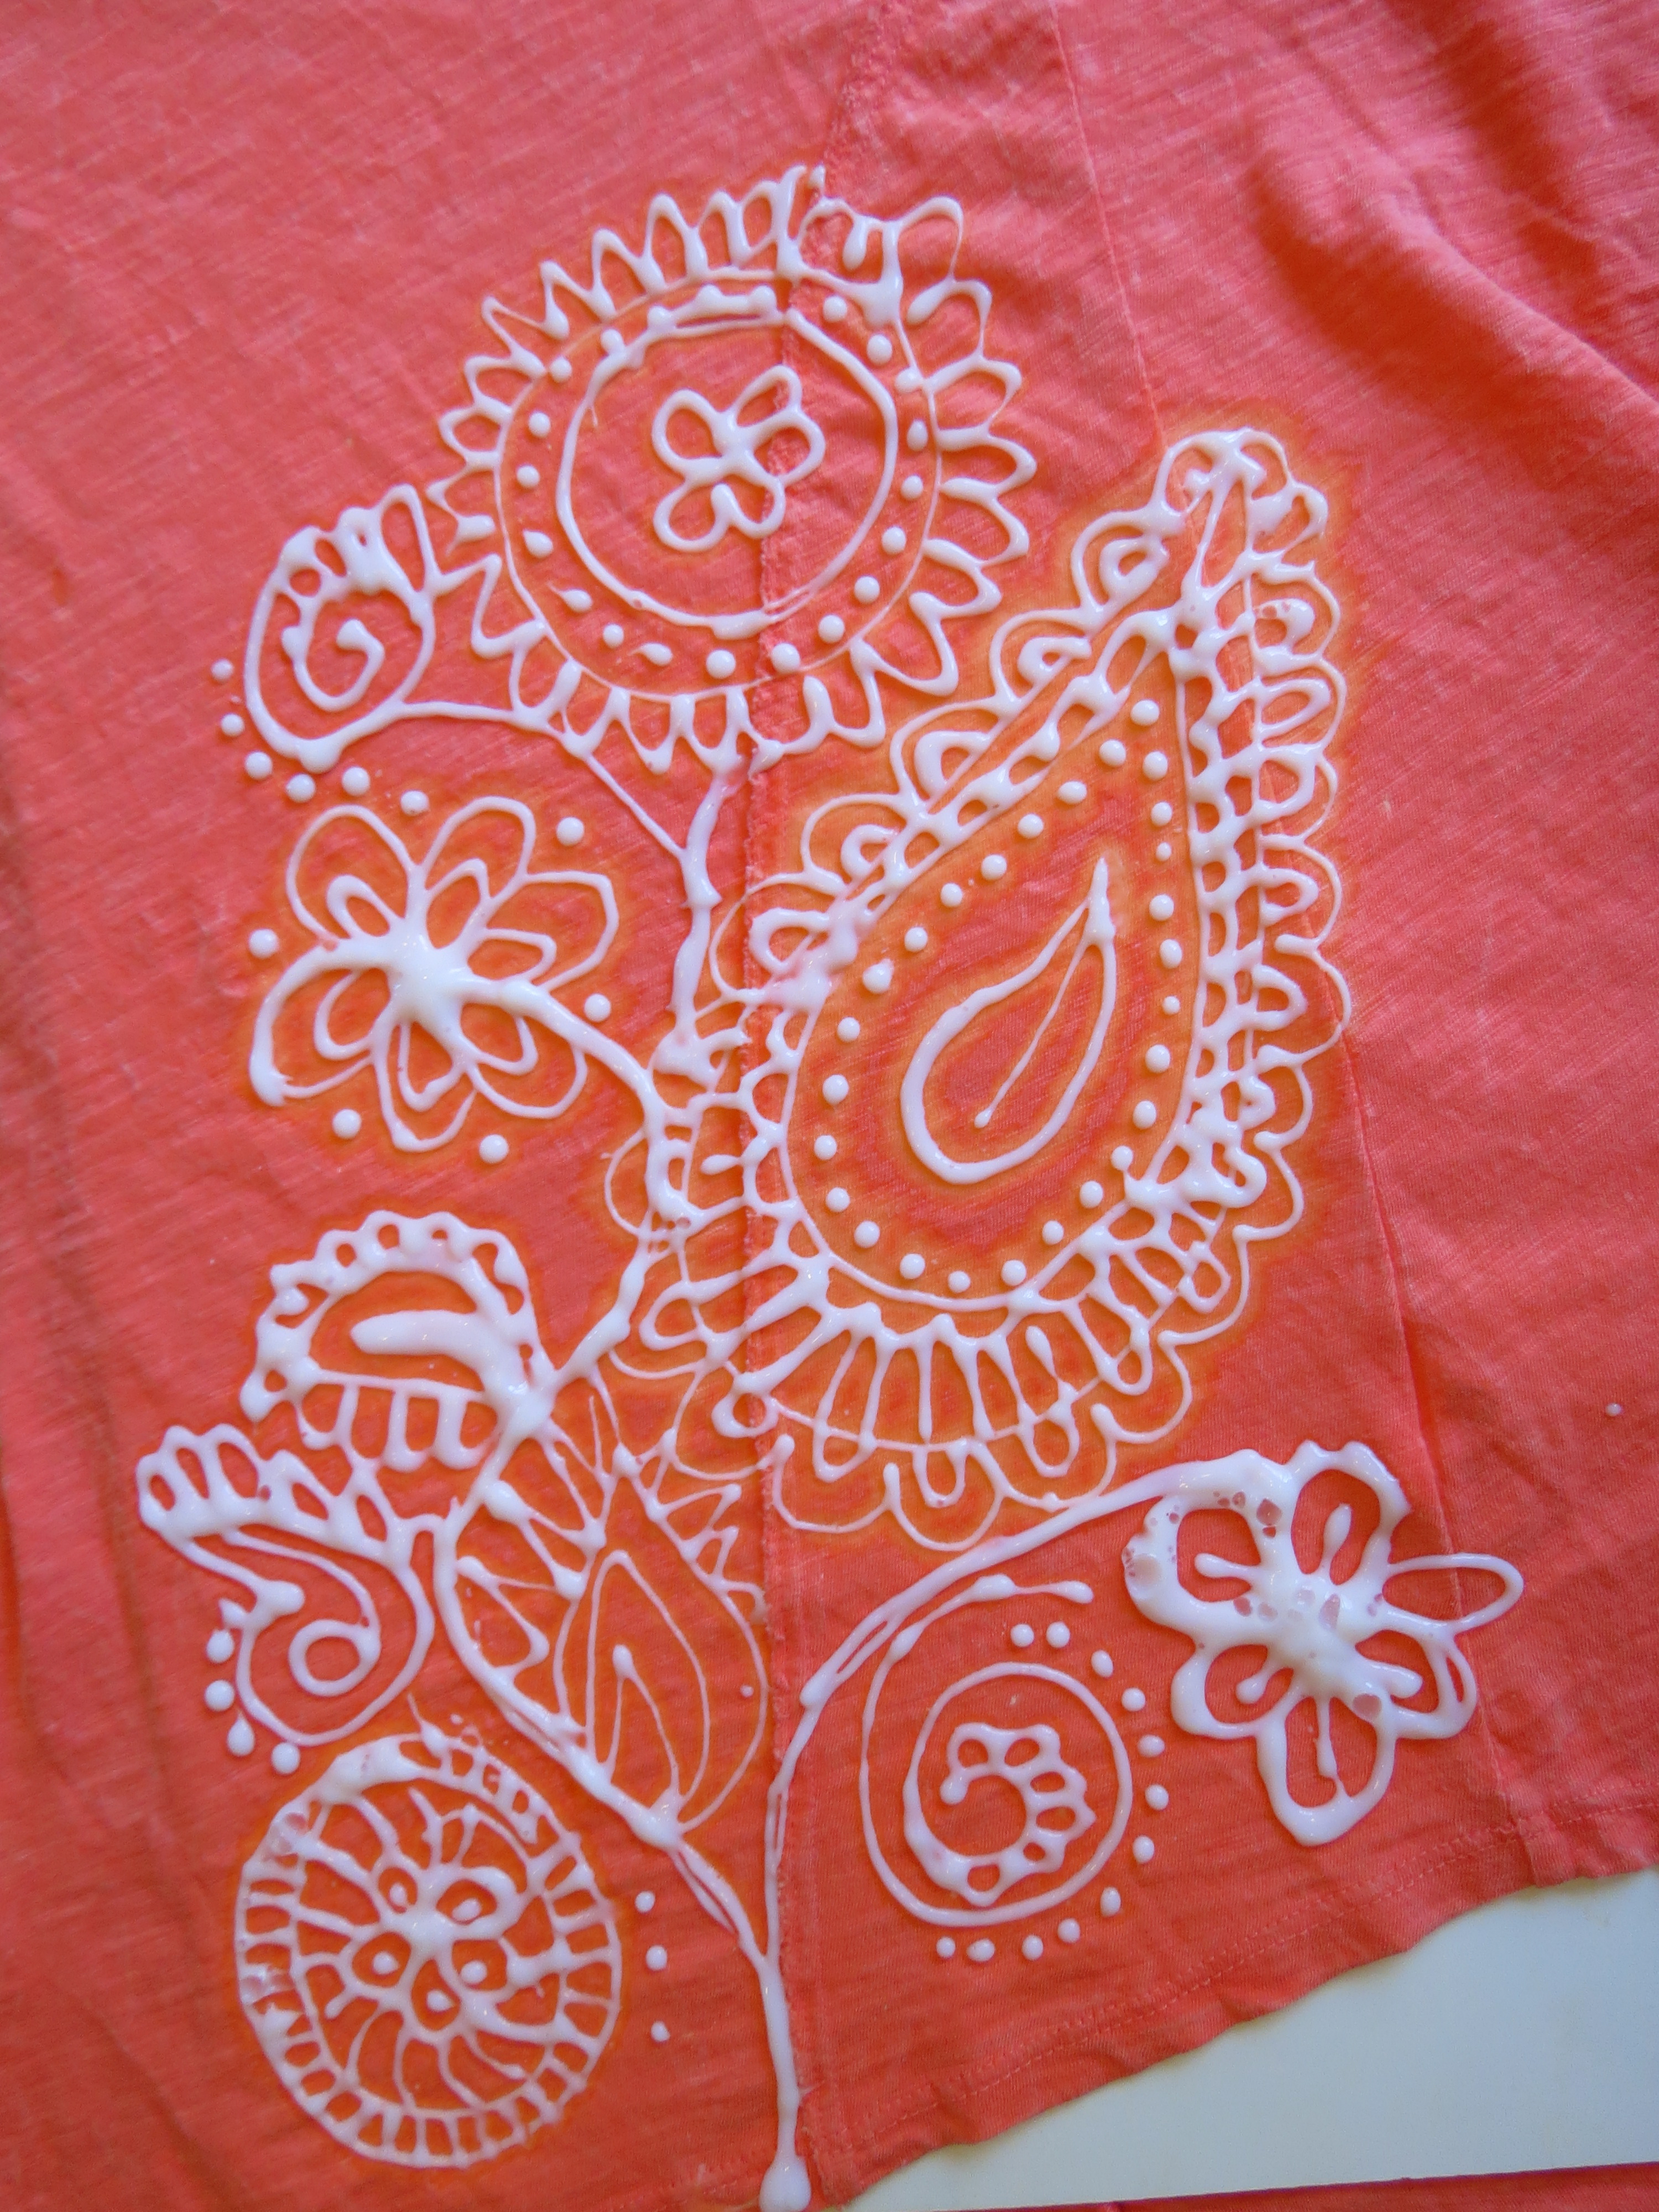
Paisley Design on Shirt
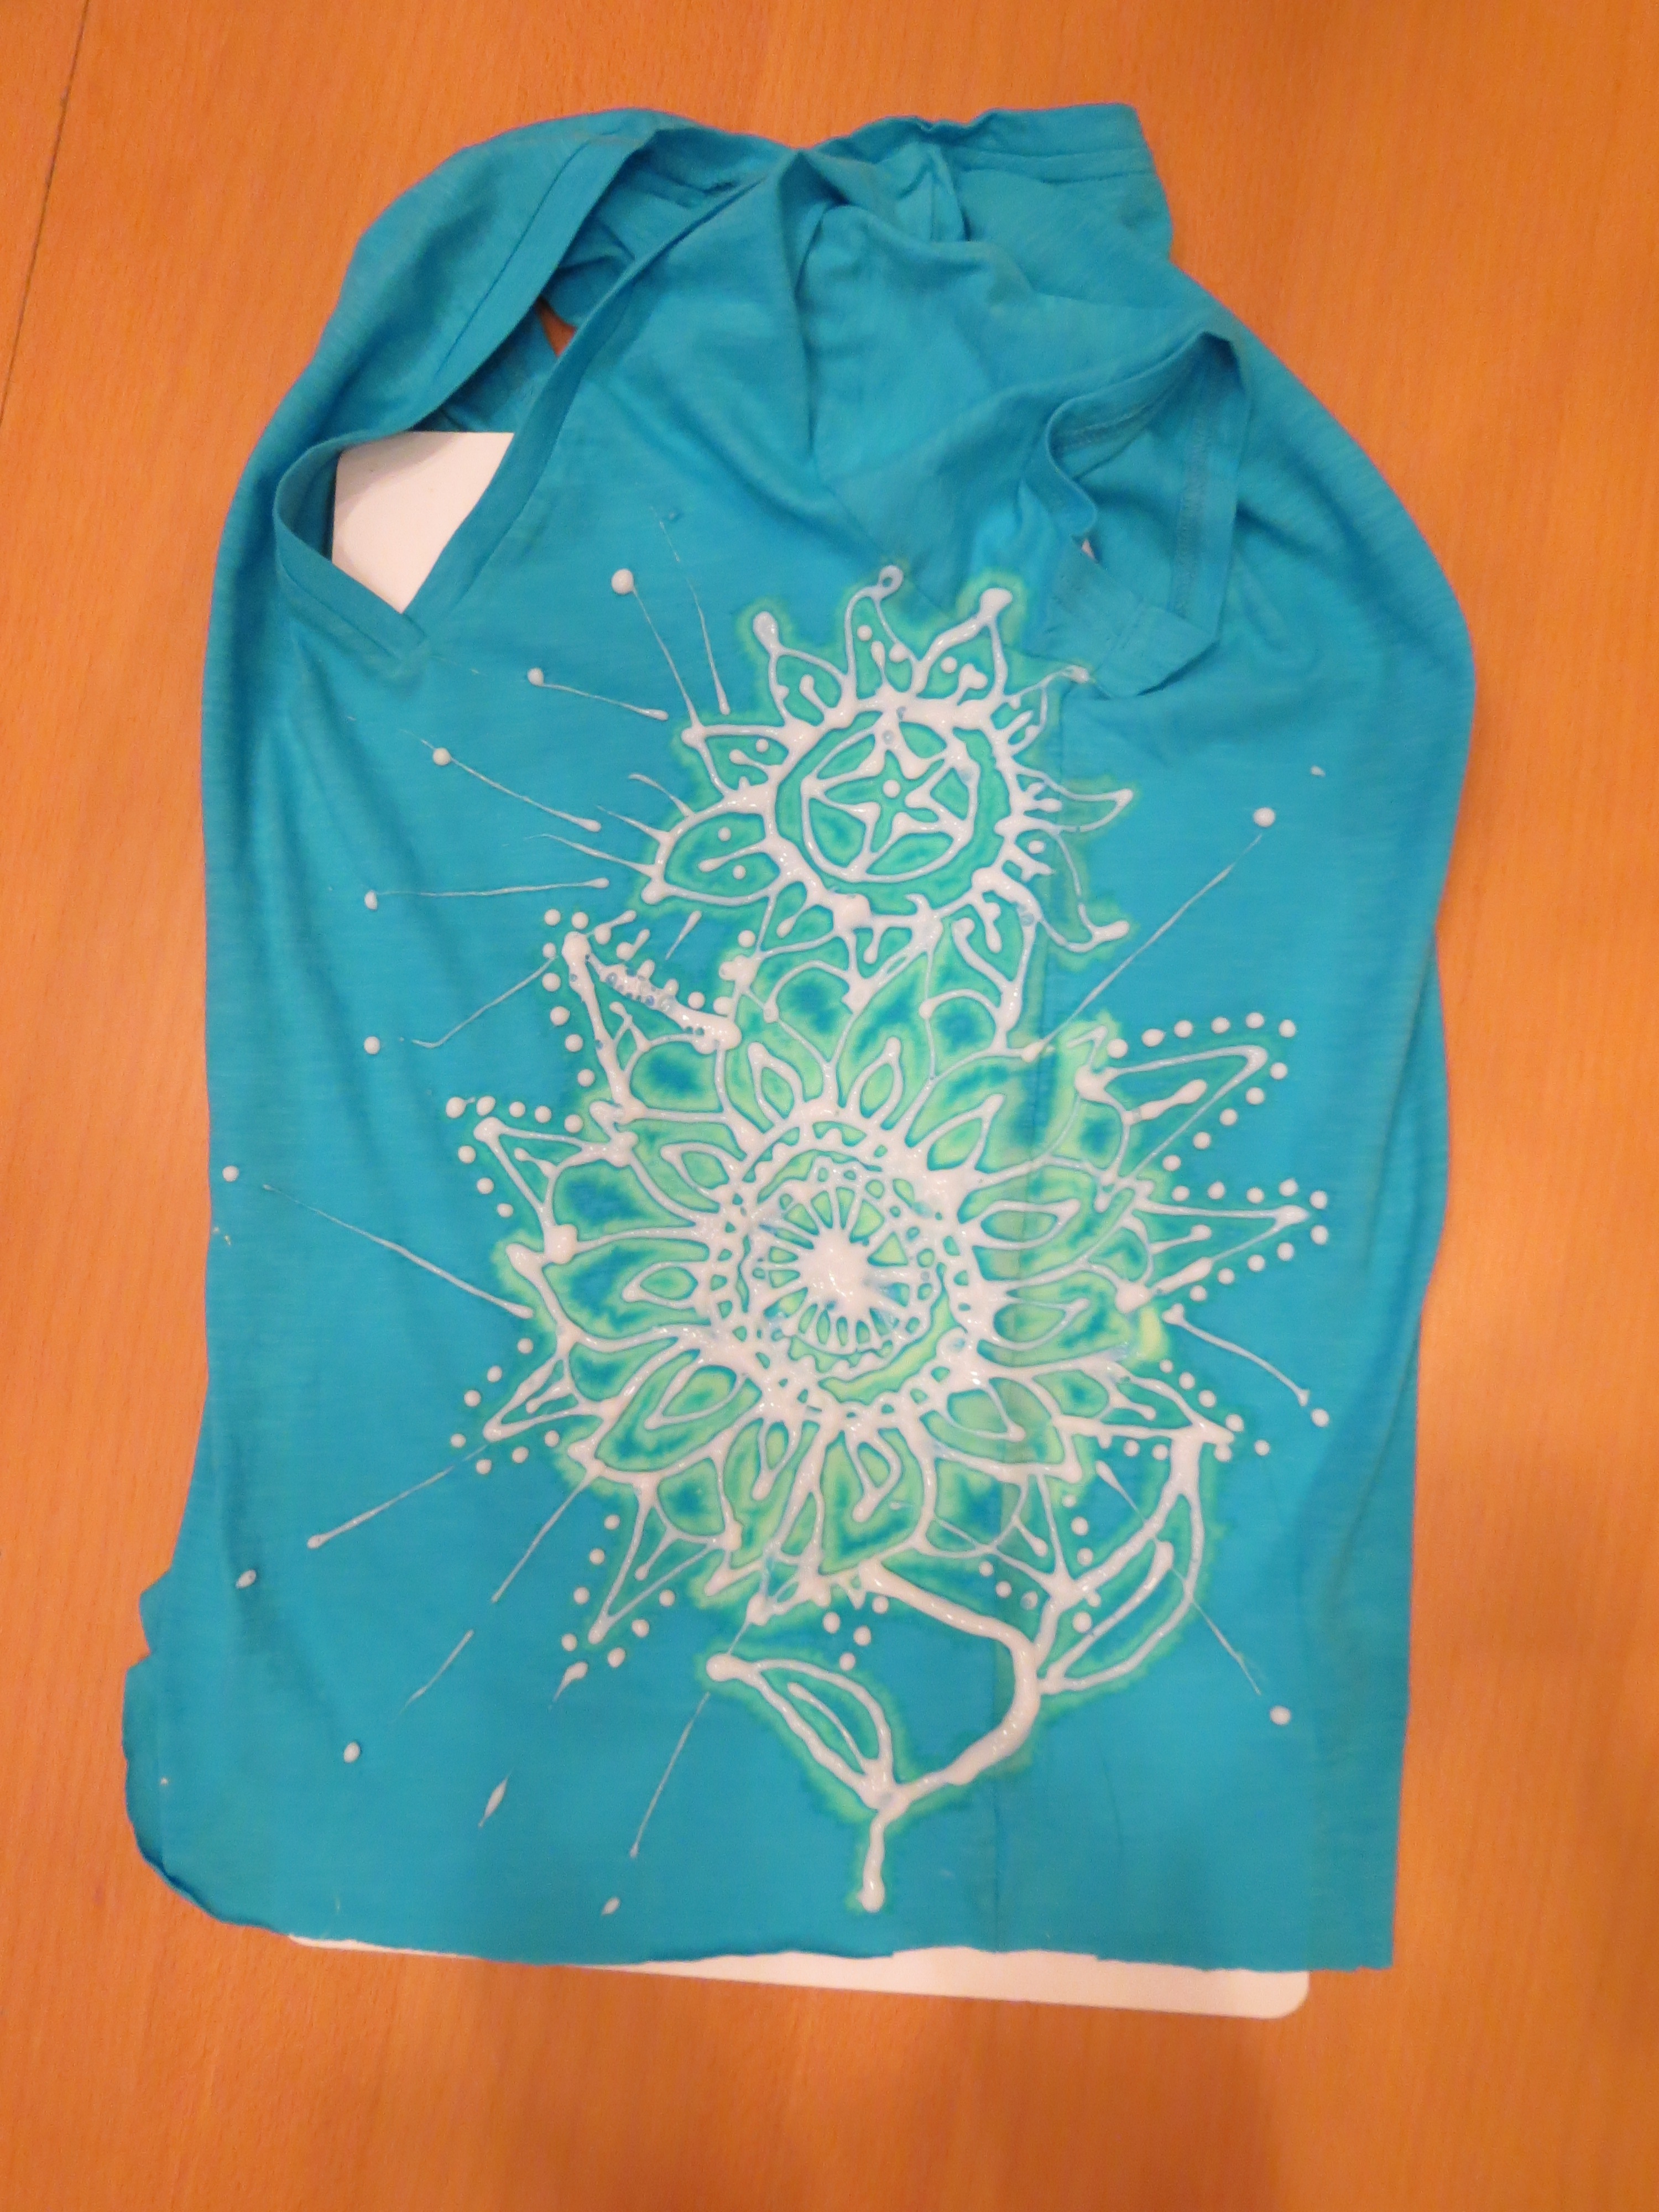
Turquoise bleach gel floral design on t-shirt
I can’t recall where I first got the idea to try these shirts. I think it was after helping kids with an art project during a summer camp I used to help teach. In the camp we used this cool fabric that kind of does the opposite of what I’m demonstrating. The kids would lay objects and shapes on the special fabric and set it out in the sun. After 5 minutes we would move it to the shade and watch how the fabric color changed color everywhere but where the objects were – very fun! I see another project coming, just in time for the summer sunshine.
Here is a shot of our gals and I posing in our newly design bleached shirts!
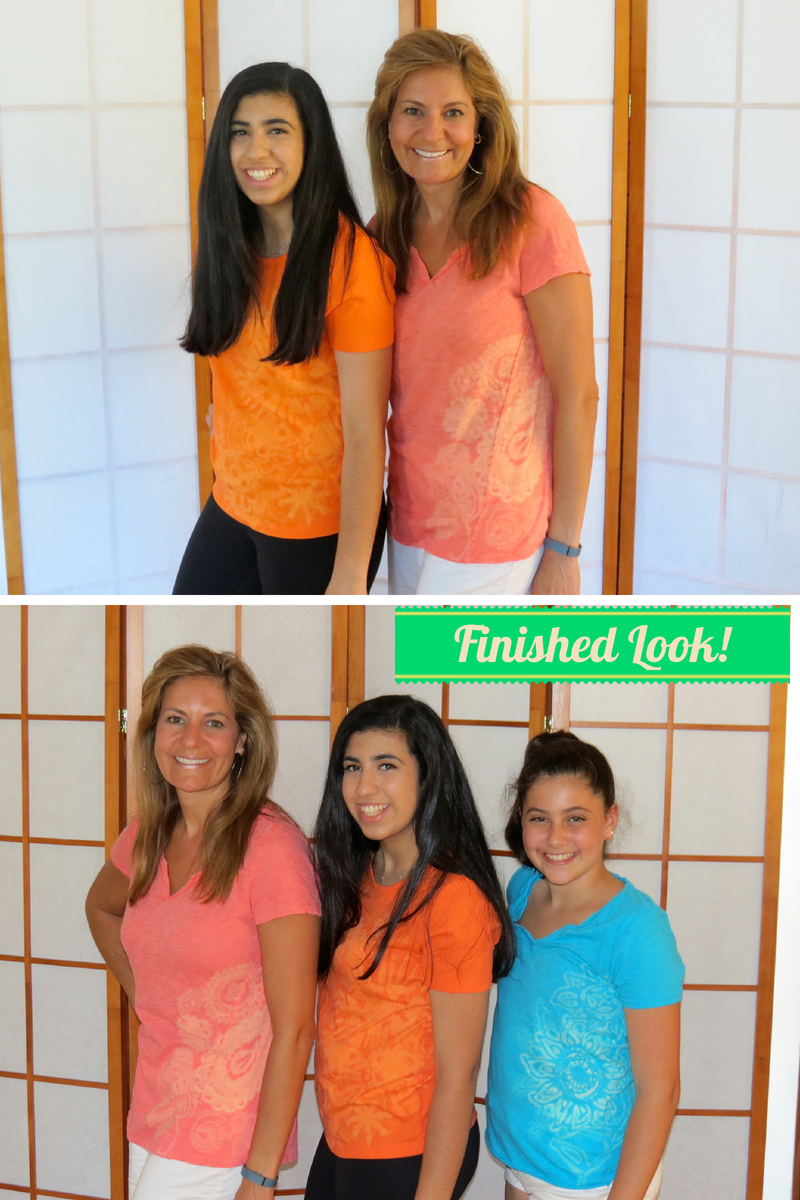
My gals and I posing in our newly designed bleached shirts!
There is another great technique for doing bleach designs using stencils. I like Jenny of ShowMeCute’s video tutorial that walks you through the steps for bleaching with a stencil.
If you’re really getting into designing your own clothes with bleach, try this technique on jeans – check out The Glamourai for a blog with some great photos of what that could look like.
For a home decorating bleach pen project, go to my post Star Struck Super 4th of July DIY Bleach Pen Pillow.
I hope you try creating your own CLOROX Bleach Pen Design T-shirt and learn the in’s and out’s of using bleach for fun and art. If you make bleach pen designs please comment and share your experience! Thank you for stopping by.
After crafting be sure to take care of yourself and check out Oven Hug – a place where you will find healthy low-sugar, low-fat, tasty recipes the whole family will enjoy.

I have a black waffle weave zip front jacket on which I accidently rubbed bleach pen which resulted with rust color bleach marks. As it is brand new, I would like to use a bleach pen to turn those obvious bleach marks into something I can actually wear. As the bleach pen pretty much instantly ‘bleached’ the fabric, my concern is when rinsing the bleach pen for my chosen design, how to do it so the bleach doesn’t smear or travel to other areas of the jacket where I don’t want it. Any suggestions? I would really like to save this garment as it is cute (not to mention I paid full price for it, lol).
Thanks for any advice.
How did it go with your jacket?
I ended up covering the spots with liquid black shoe polish and it seemed to work. Time, as it always does, will tell if it will be a lasting solution.
Hey am about to test this
Wanna ask that after washing, does the surface you applies the bleach on remain smooth or does the design form like a chew gum bombs on the cloth?
JB, sounds like a clever and creative solution. Hope it did the trick!
is it safe to breath in the fumes from the pen….do you work outside or indoors?
I used the clorox bleach pen for about an hour,…and realized I wasn’t working in the best ventilated area….and my throat was sore. I said to myself how stupid could I be…..how do you avoid breathing in the fumes?
I see you don’t monetize your page, don’t waste your traffic,
you can earn additional bucks every month because you’ve got hi quality content.
If you want to know how to make extra money, search for: best
adsense alternative Boorfe’s tips